> ## Documentation Index
> Fetch the complete documentation index at: https://docs.usedatabrain.com/llms.txt
> Use this file to discover all available pages before exploring further.
# Token API v1 → v2 Migration
> Guide for migrating existing integrations for generating token from API v1 to v2, covering differences, deprecations, and implementation steps.
**Note**: v2 is mostly compatible with v1, with only slight differences in endpoint paths and some parameter naming/placement.
### Endpoint URL Changes
* v1
```
POST https://api.usedatabrain.com/api/v1/guest-token/create
```
* v2
```
POST https://api.usedatabrain.com/api/v2/guest-token/create
```
**Note** : The url remains same except in place of v1 it will be v2.
### Parameter Adjustments
In API v1, tokens were generated using the `clientId` along with `workspaceName` and `datasourceName`.
In API v2, this has been simplified by introducing a `dataApp`, so you only need to pass the `clientId` and `dataAppName`. The main change is that v2 replaces the separate workspace and datasource parameters with a single dataApp reference.
* v1 example request body:
```
{
"clientId": "your-client-id",
"workspaceName": "your_workspace",
"datasourceName": "your_datasource",
}
```
* v2 example request body:
```
{
"clientId": "your-client-id",
"dataAppName": "your_data_app",
}
```
**Note**: In both v1 and v2, the authorization parameter works the same way. The only difference is that in v1 you used the API token from global settings, while in v2 you must use the API token generated within the dataApp. This ensures that authorization is scoped specifically to the dataApp.
### Permissions
* In v1, we used to set permissions in the workspace settings for creating metric, updating metric, deleting metric etc.
* In v2, all these permission needs to be enabled in the specific dataApp itself.
### Create Metric
* In v1, we used to just enable the create metric option in workspace settings and chose the power mode option.
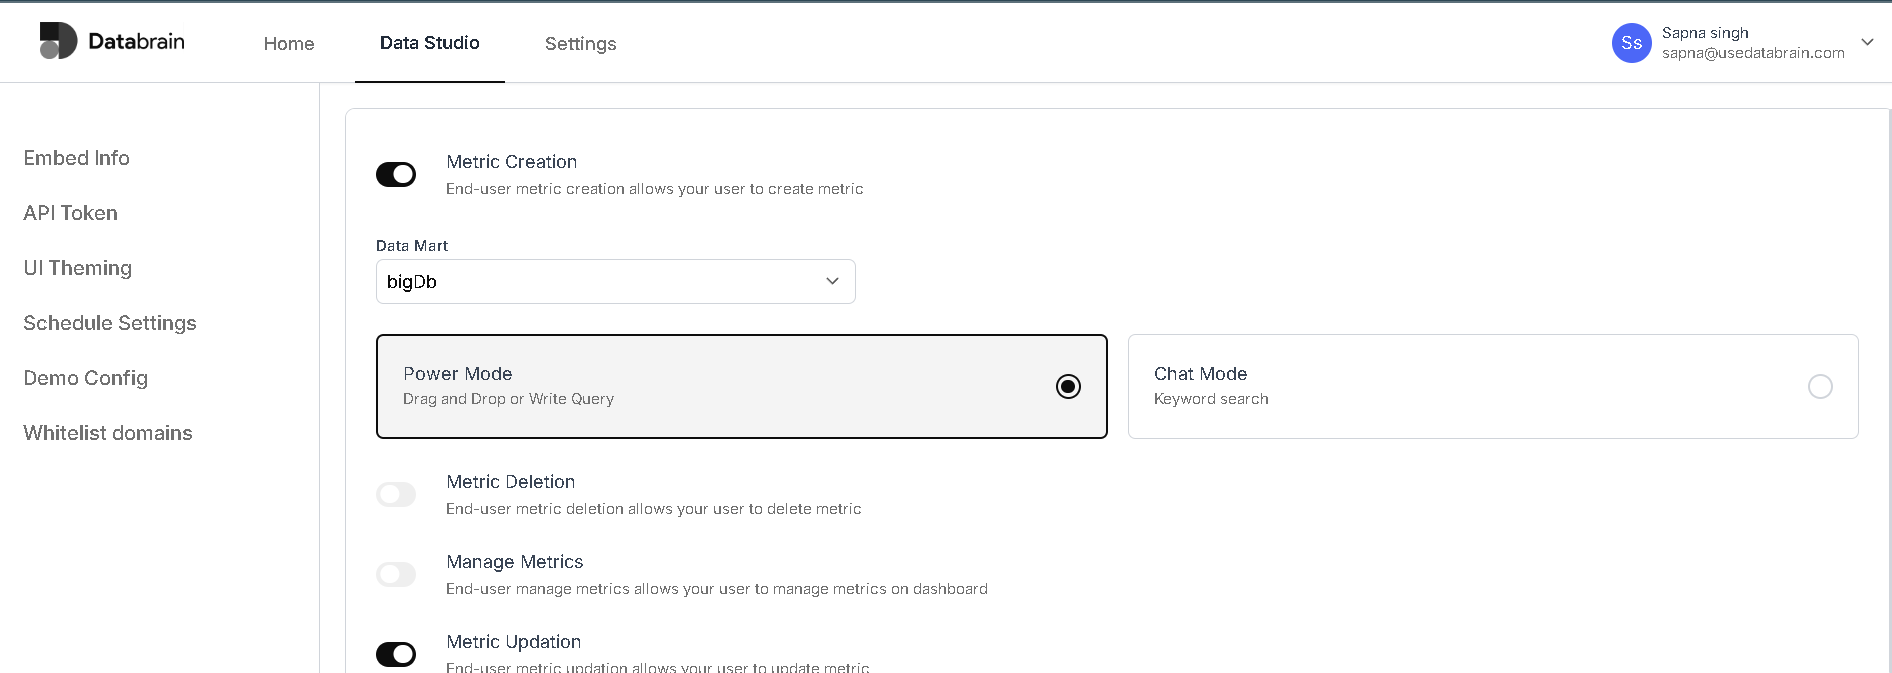
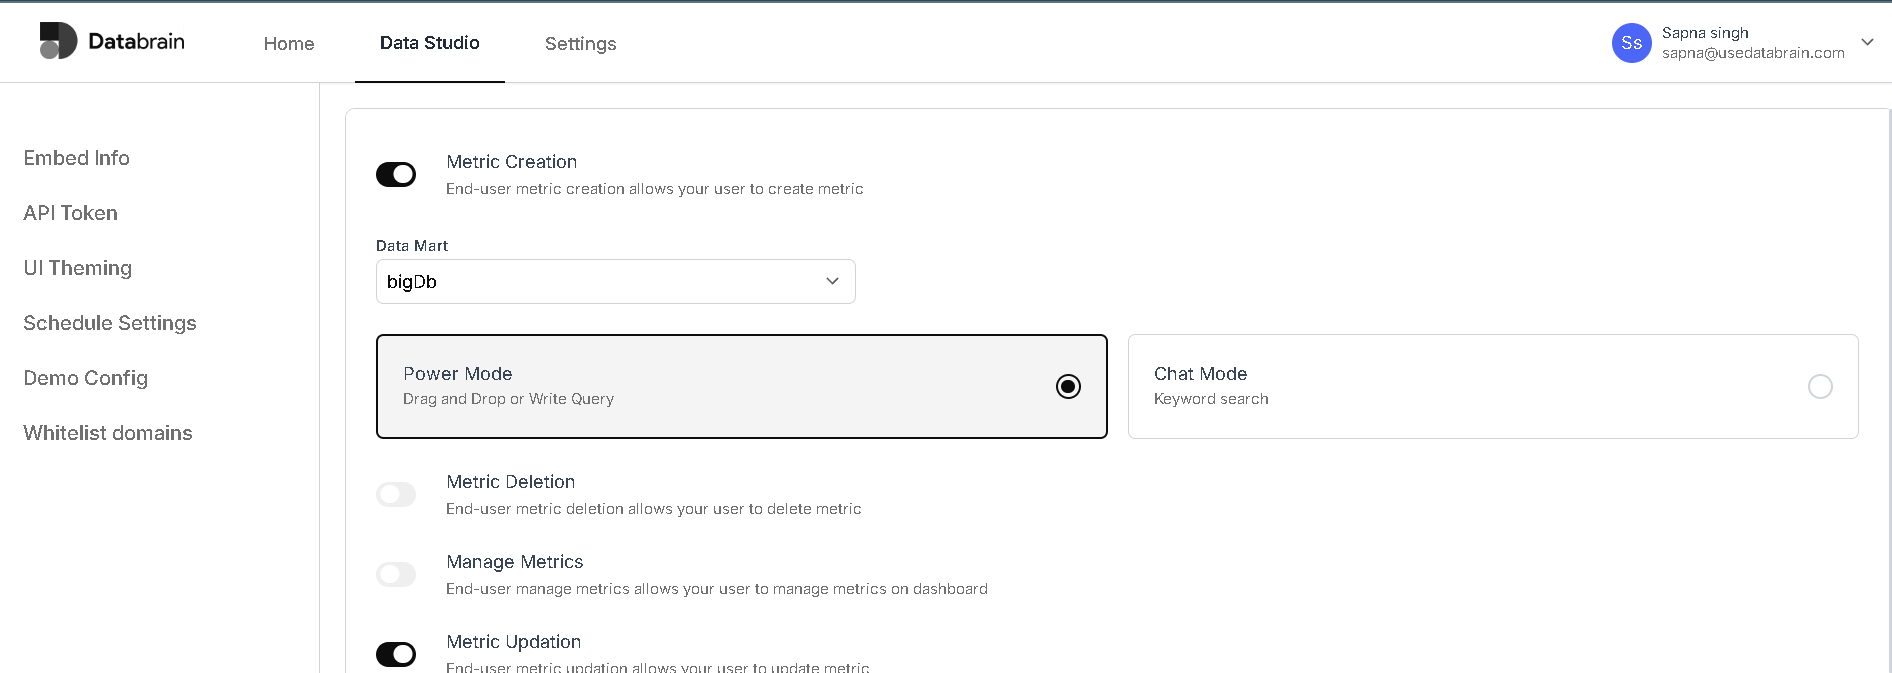 * In v2, you first create a \*\*datamart \*\*from the same datasource you previously used in **v1**. Then, when enabling permissions like *create metric*, you reference that datamart within the dataApp settings.
 ### Migration & Token Compatibility
* Both v1 and v2 tokens will continue to work with the same dashboard ID.
* However, note that settings applied using v1 tokens will not apply when using v2 tokens, and vice versa.
* Each version’s settings are independent, even though the tokens can coexist.
### Migration & Token Compatibility
* Both v1 and v2 tokens will continue to work with the same dashboard ID.
* However, note that settings applied using v1 tokens will not apply when using v2 tokens, and vice versa.
* Each version’s settings are independent, even though the tokens can coexist.