> ## Documentation Index
> Fetch the complete documentation index at: https://docs.usedatabrain.com/llms.txt
> Use this file to discover all available pages before exploring further.
# Boards
> Boards allow you to save multiple configurations of a dashboard based on applied dashboard metric filters, and switch axis. You can then quickly switch between these saved boards without re-applying filters every time.
## **Why Use Boards?**
* Save time by avoiding repetitive filter selections.
* Quickly switch between perspectives (e.g., different locations, time ranges, or product types).
* Share consistent dashboard states with your team.
## **Steps to Create a Board**
### **1. Open Your Dashboard**
* Navigate to the dashboard you want to work with.
### **2. Apply Filters**
* Use the filter panel to set conditions (for example: Location = “North Region”, Date Range = “Last 30 Days”).
* Confirm the dashboard updates with your selected filters.
### **3. Save as a Board**
* Open the **Dashboard Settings** dropdown and toggle **Enable Board**.
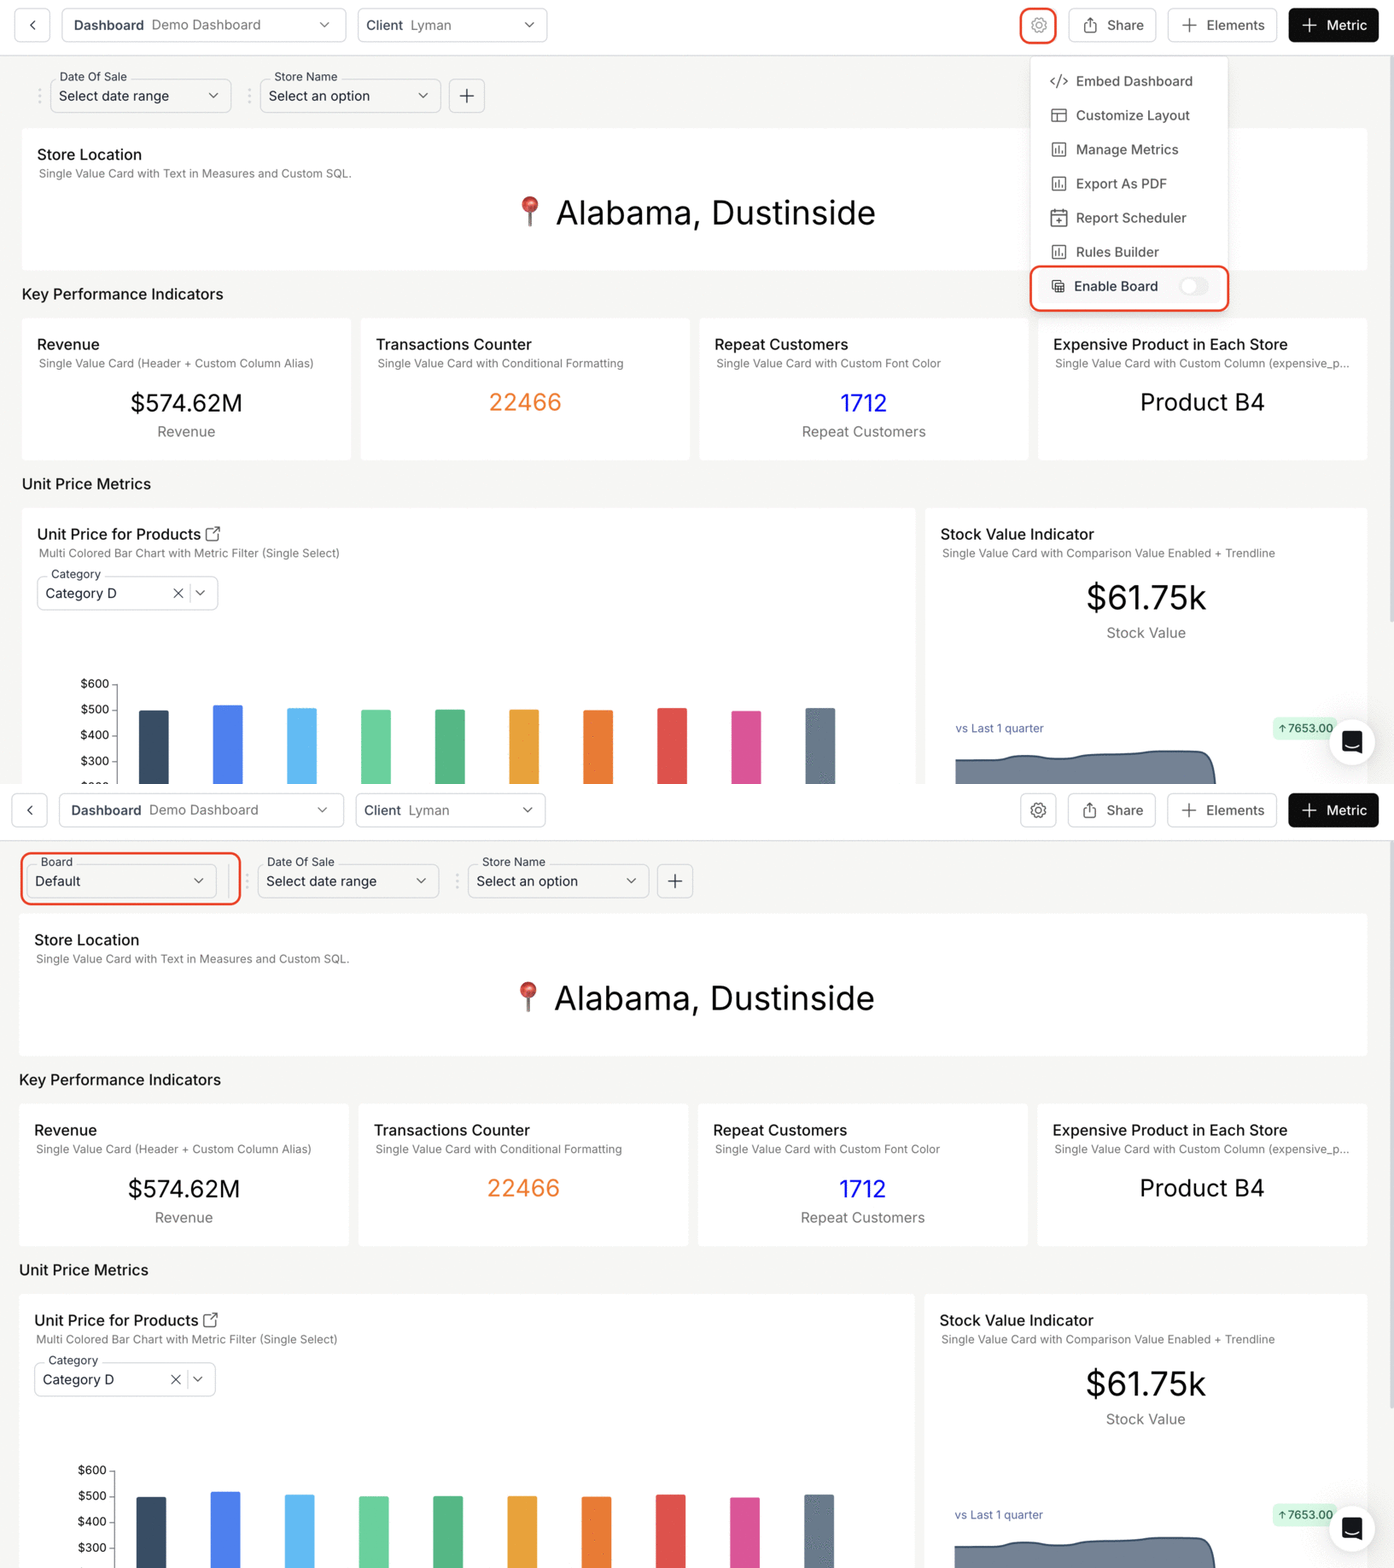 * In the **Board** dropdown, click **+ Add Board**.
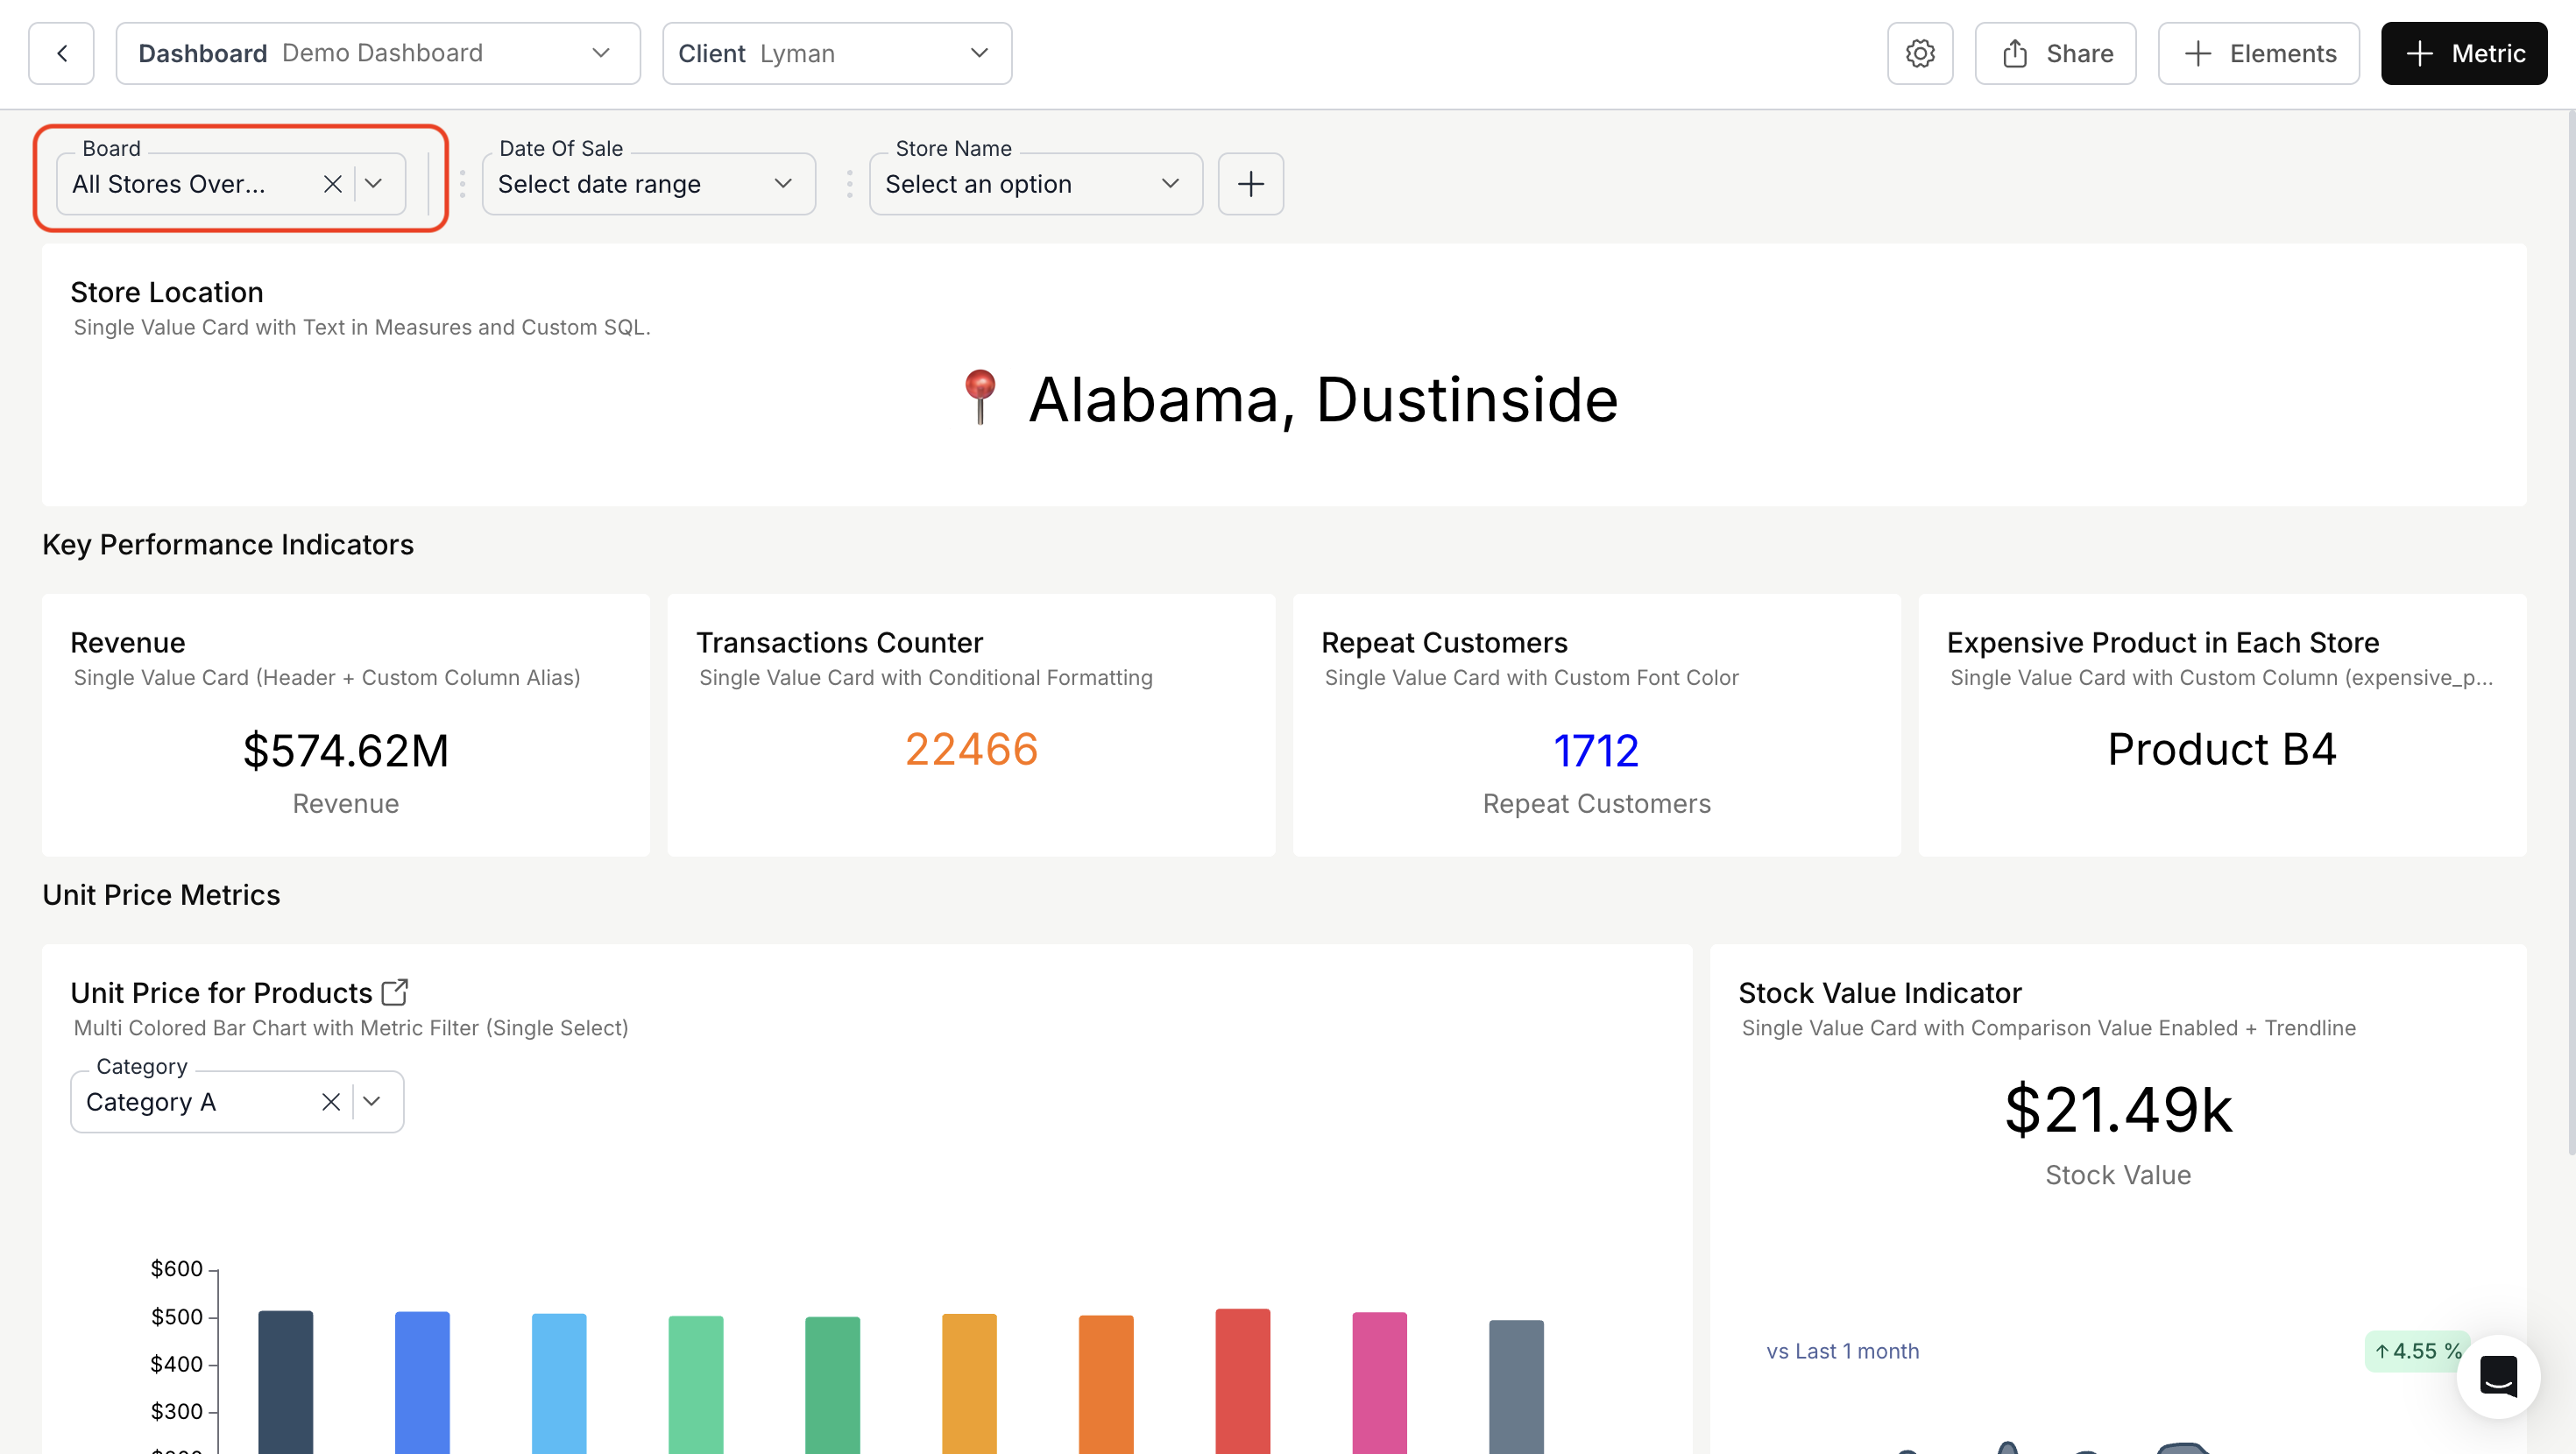
* Enter a name for your board and click **Save Board**.
* Example: *"All Stores Overview"*
* In the **Board** dropdown, click **+ Add Board**.
* Enter a name for your board and click **Save Board**.
* Example: *"All Stores Overview"*
 * **All Stores Overview** is created
 ### **4. Switch Between Boards**
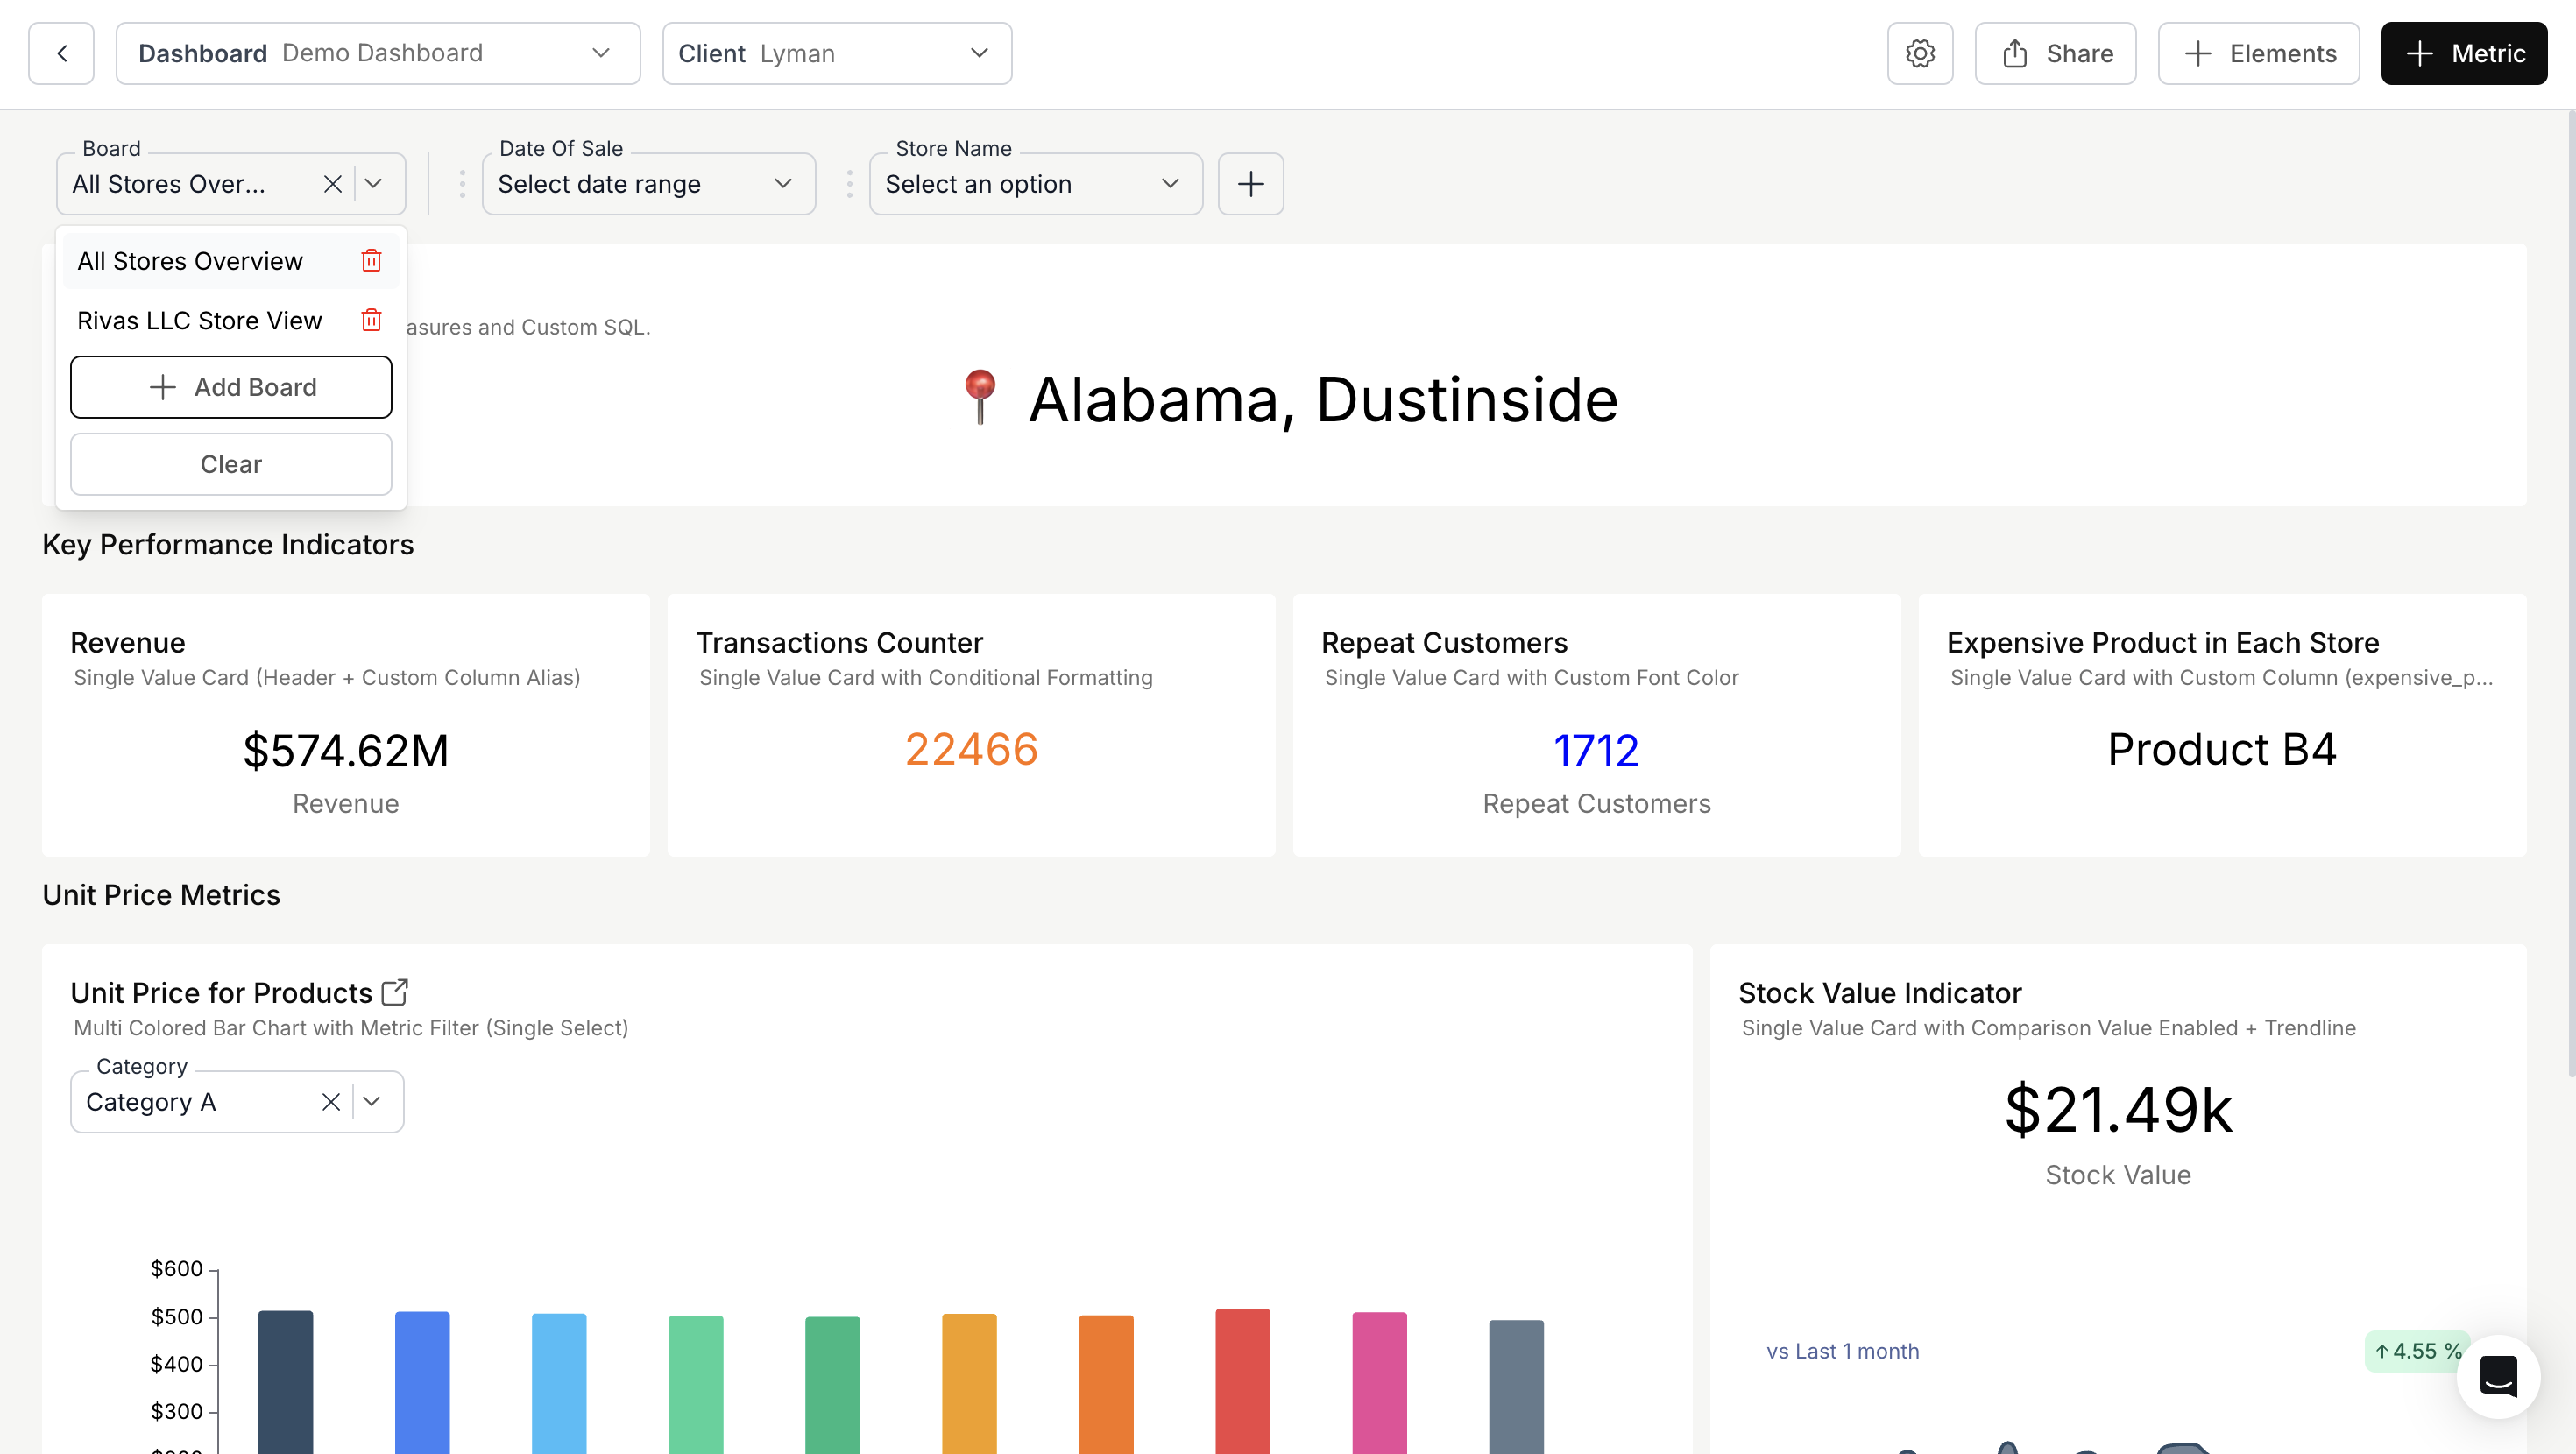
* Open the **"Board"** dropdown to view the list of all your saved boards.
* Select a board to load it—the dashboard will automatically update with the saved filters.
### **4. Switch Between Boards**
* Open the **"Board"** dropdown to view the list of all your saved boards.
* Select a board to load it—the dashboard will automatically update with the saved filters.
 ### **5. Delete Boards**
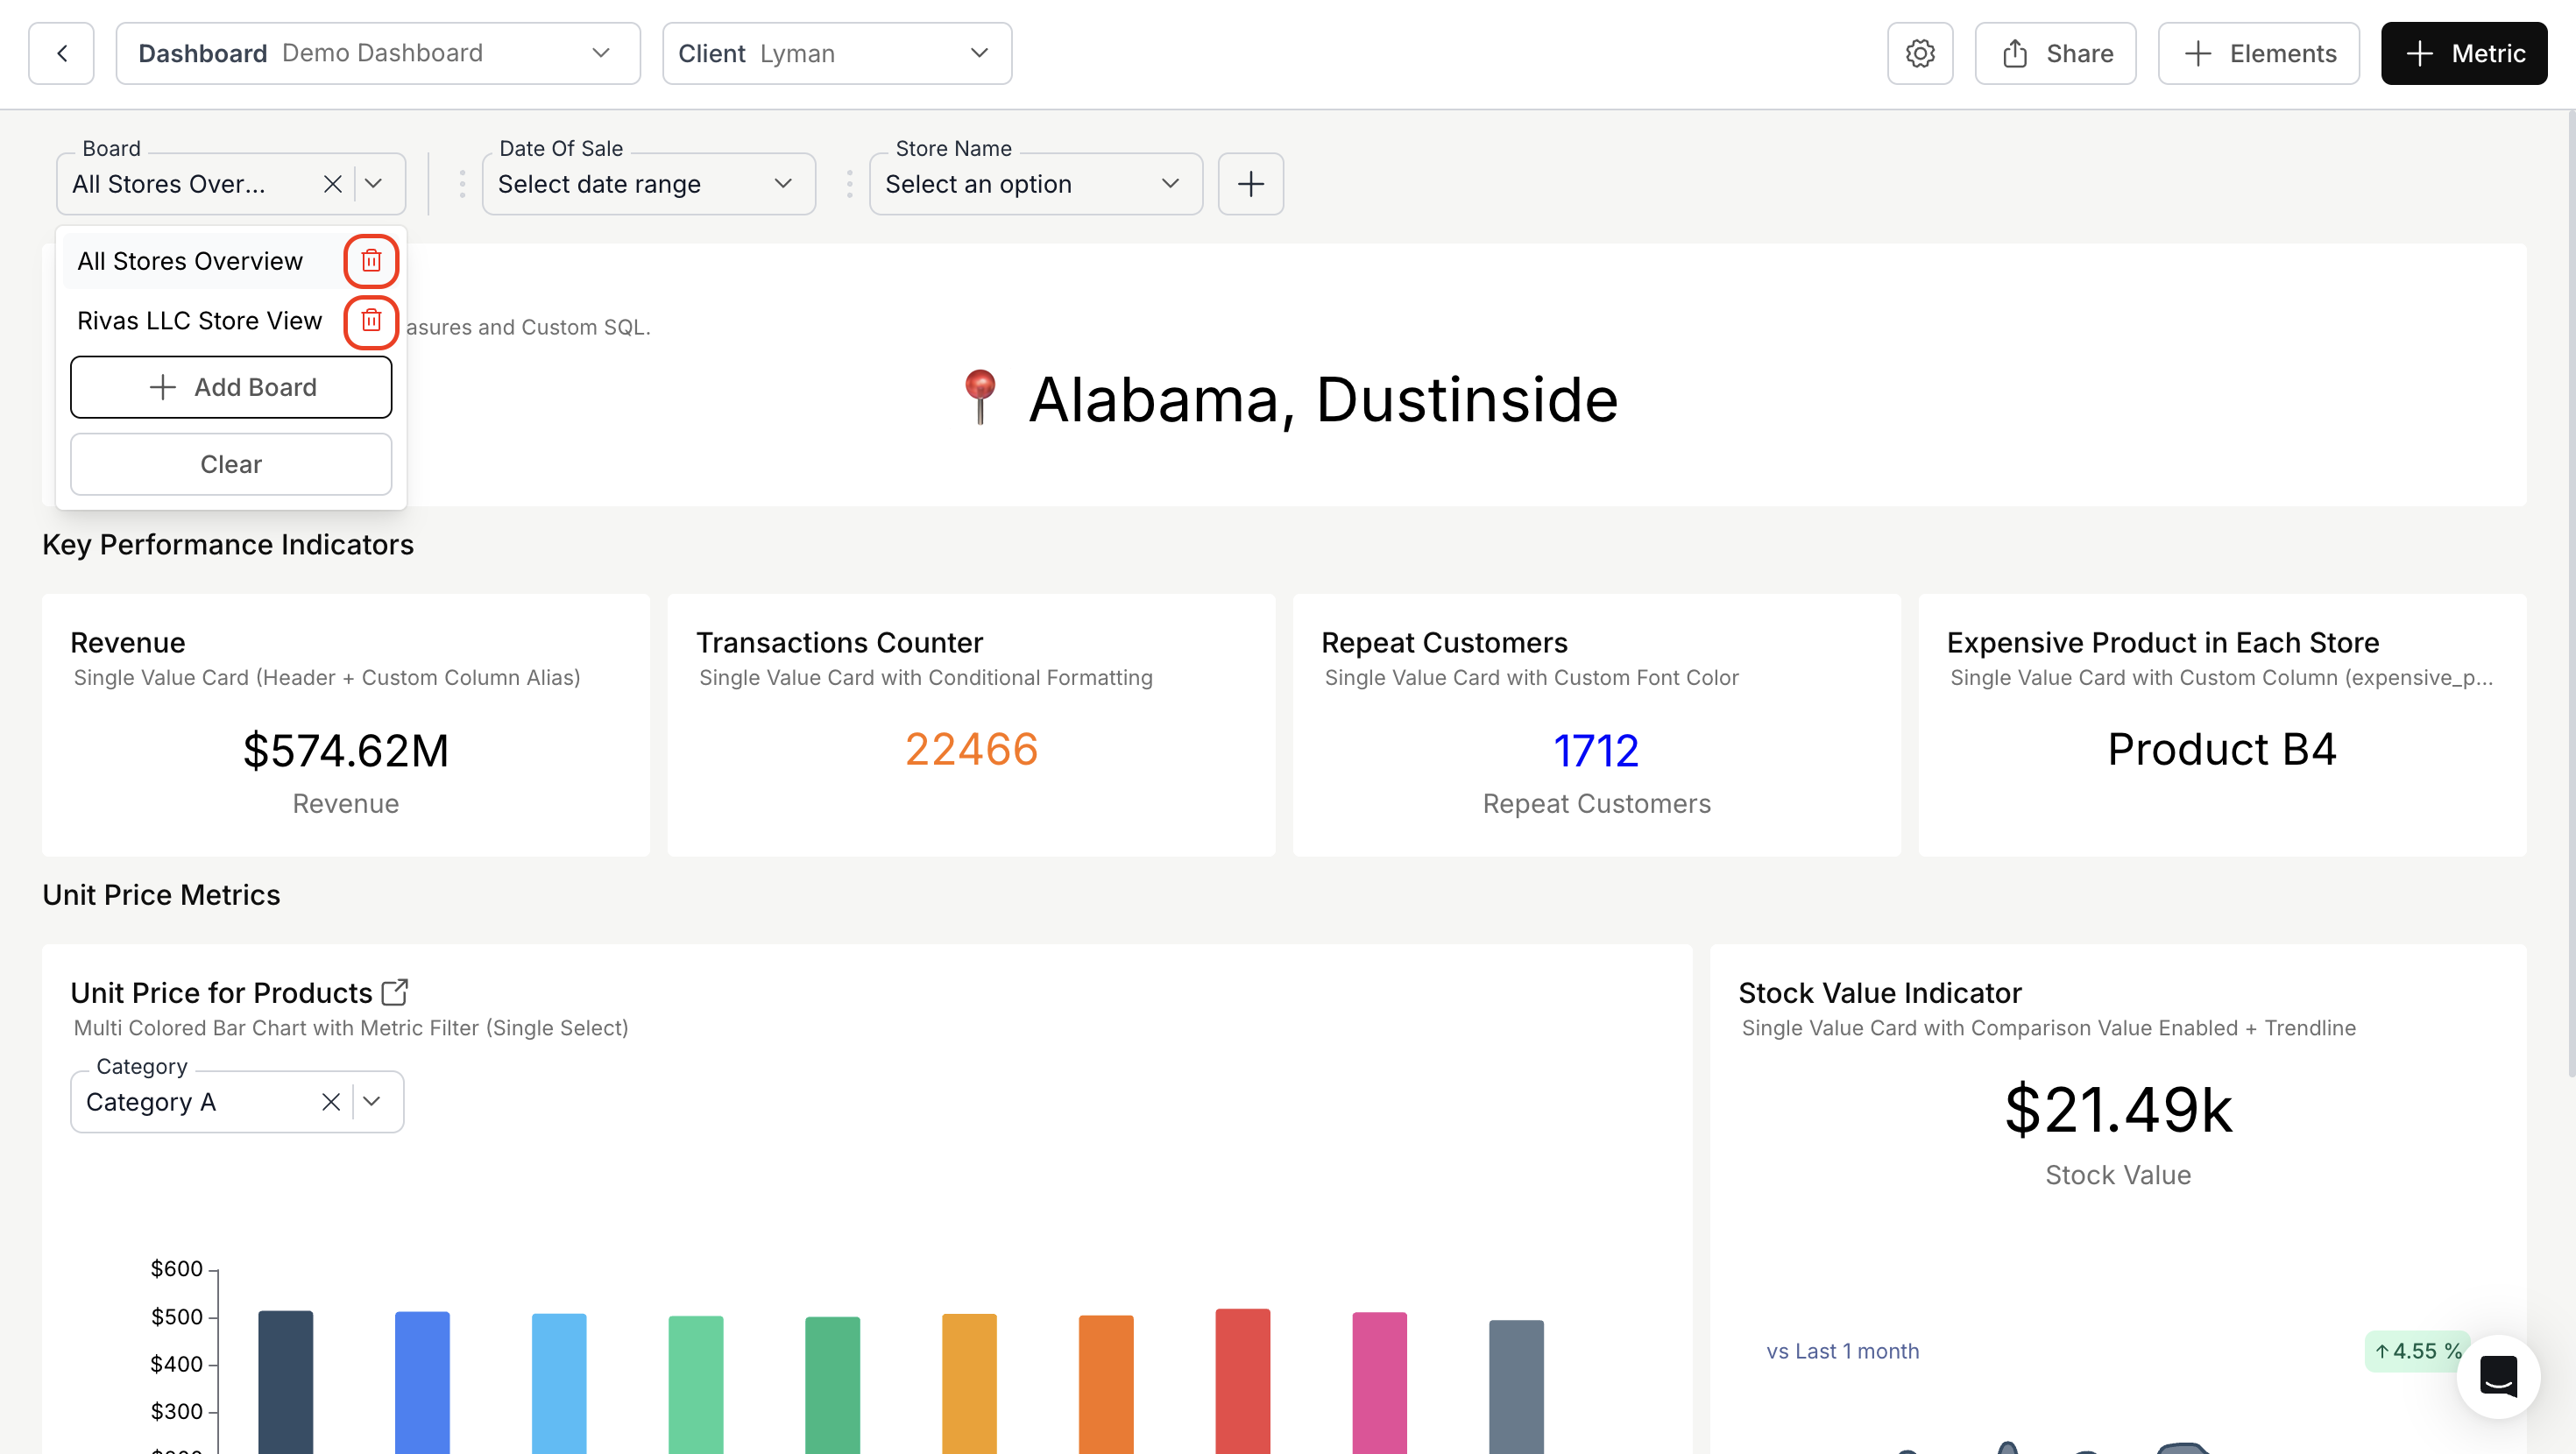
* From the **Board** dropdown, you can **delete** saved boards
### **5. Delete Boards**
* From the **Board** dropdown, you can **delete** saved boards
 You’ve successfully created and managed Boards.\
Your dashboard now supports fast, filter-based switching—making analysis smoother, faster, and far more organized.
You’ve successfully created and managed Boards.\
Your dashboard now supports fast, filter-based switching—making analysis smoother, faster, and far more organized.