> ## Documentation Index
> Fetch the complete documentation index at: https://docs.usedatabrain.com/llms.txt
> Use this file to discover all available pages before exploring further.
# Schedule Reports For Internal Users
> This guide demonstrates how to create, schedule, and manage automated dashboard reports with flexible delivery options for users.
Please refer the below guide if email settings is not configured.
## 1. Access Report Scheduler
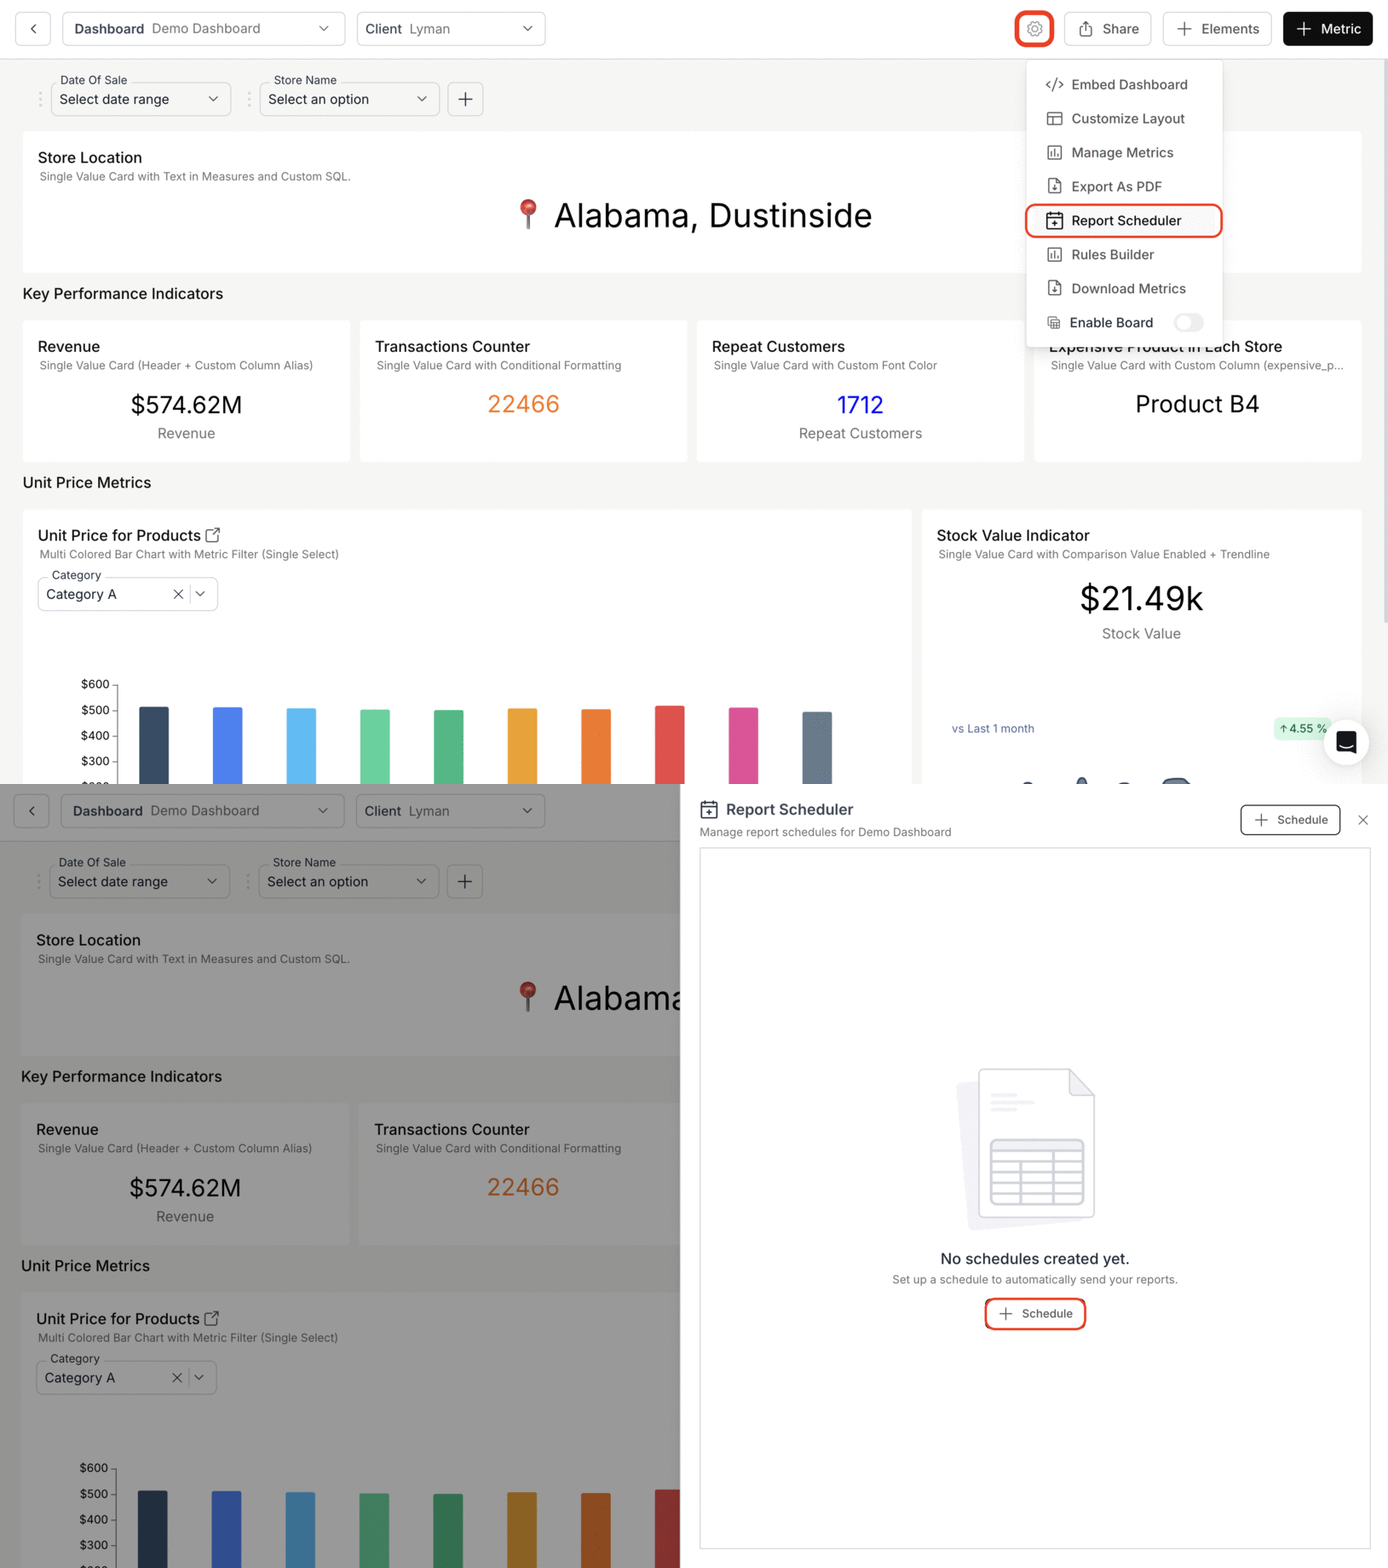
* Click on the **Settings** icon located next to the Preview icon.
* Select **"Report Scheduler"** from the dropdown menu.
* Then, click on the **"+ New Schedule"** button in the Report Scheduler window.
 ## 2. Configure Report Scheduler
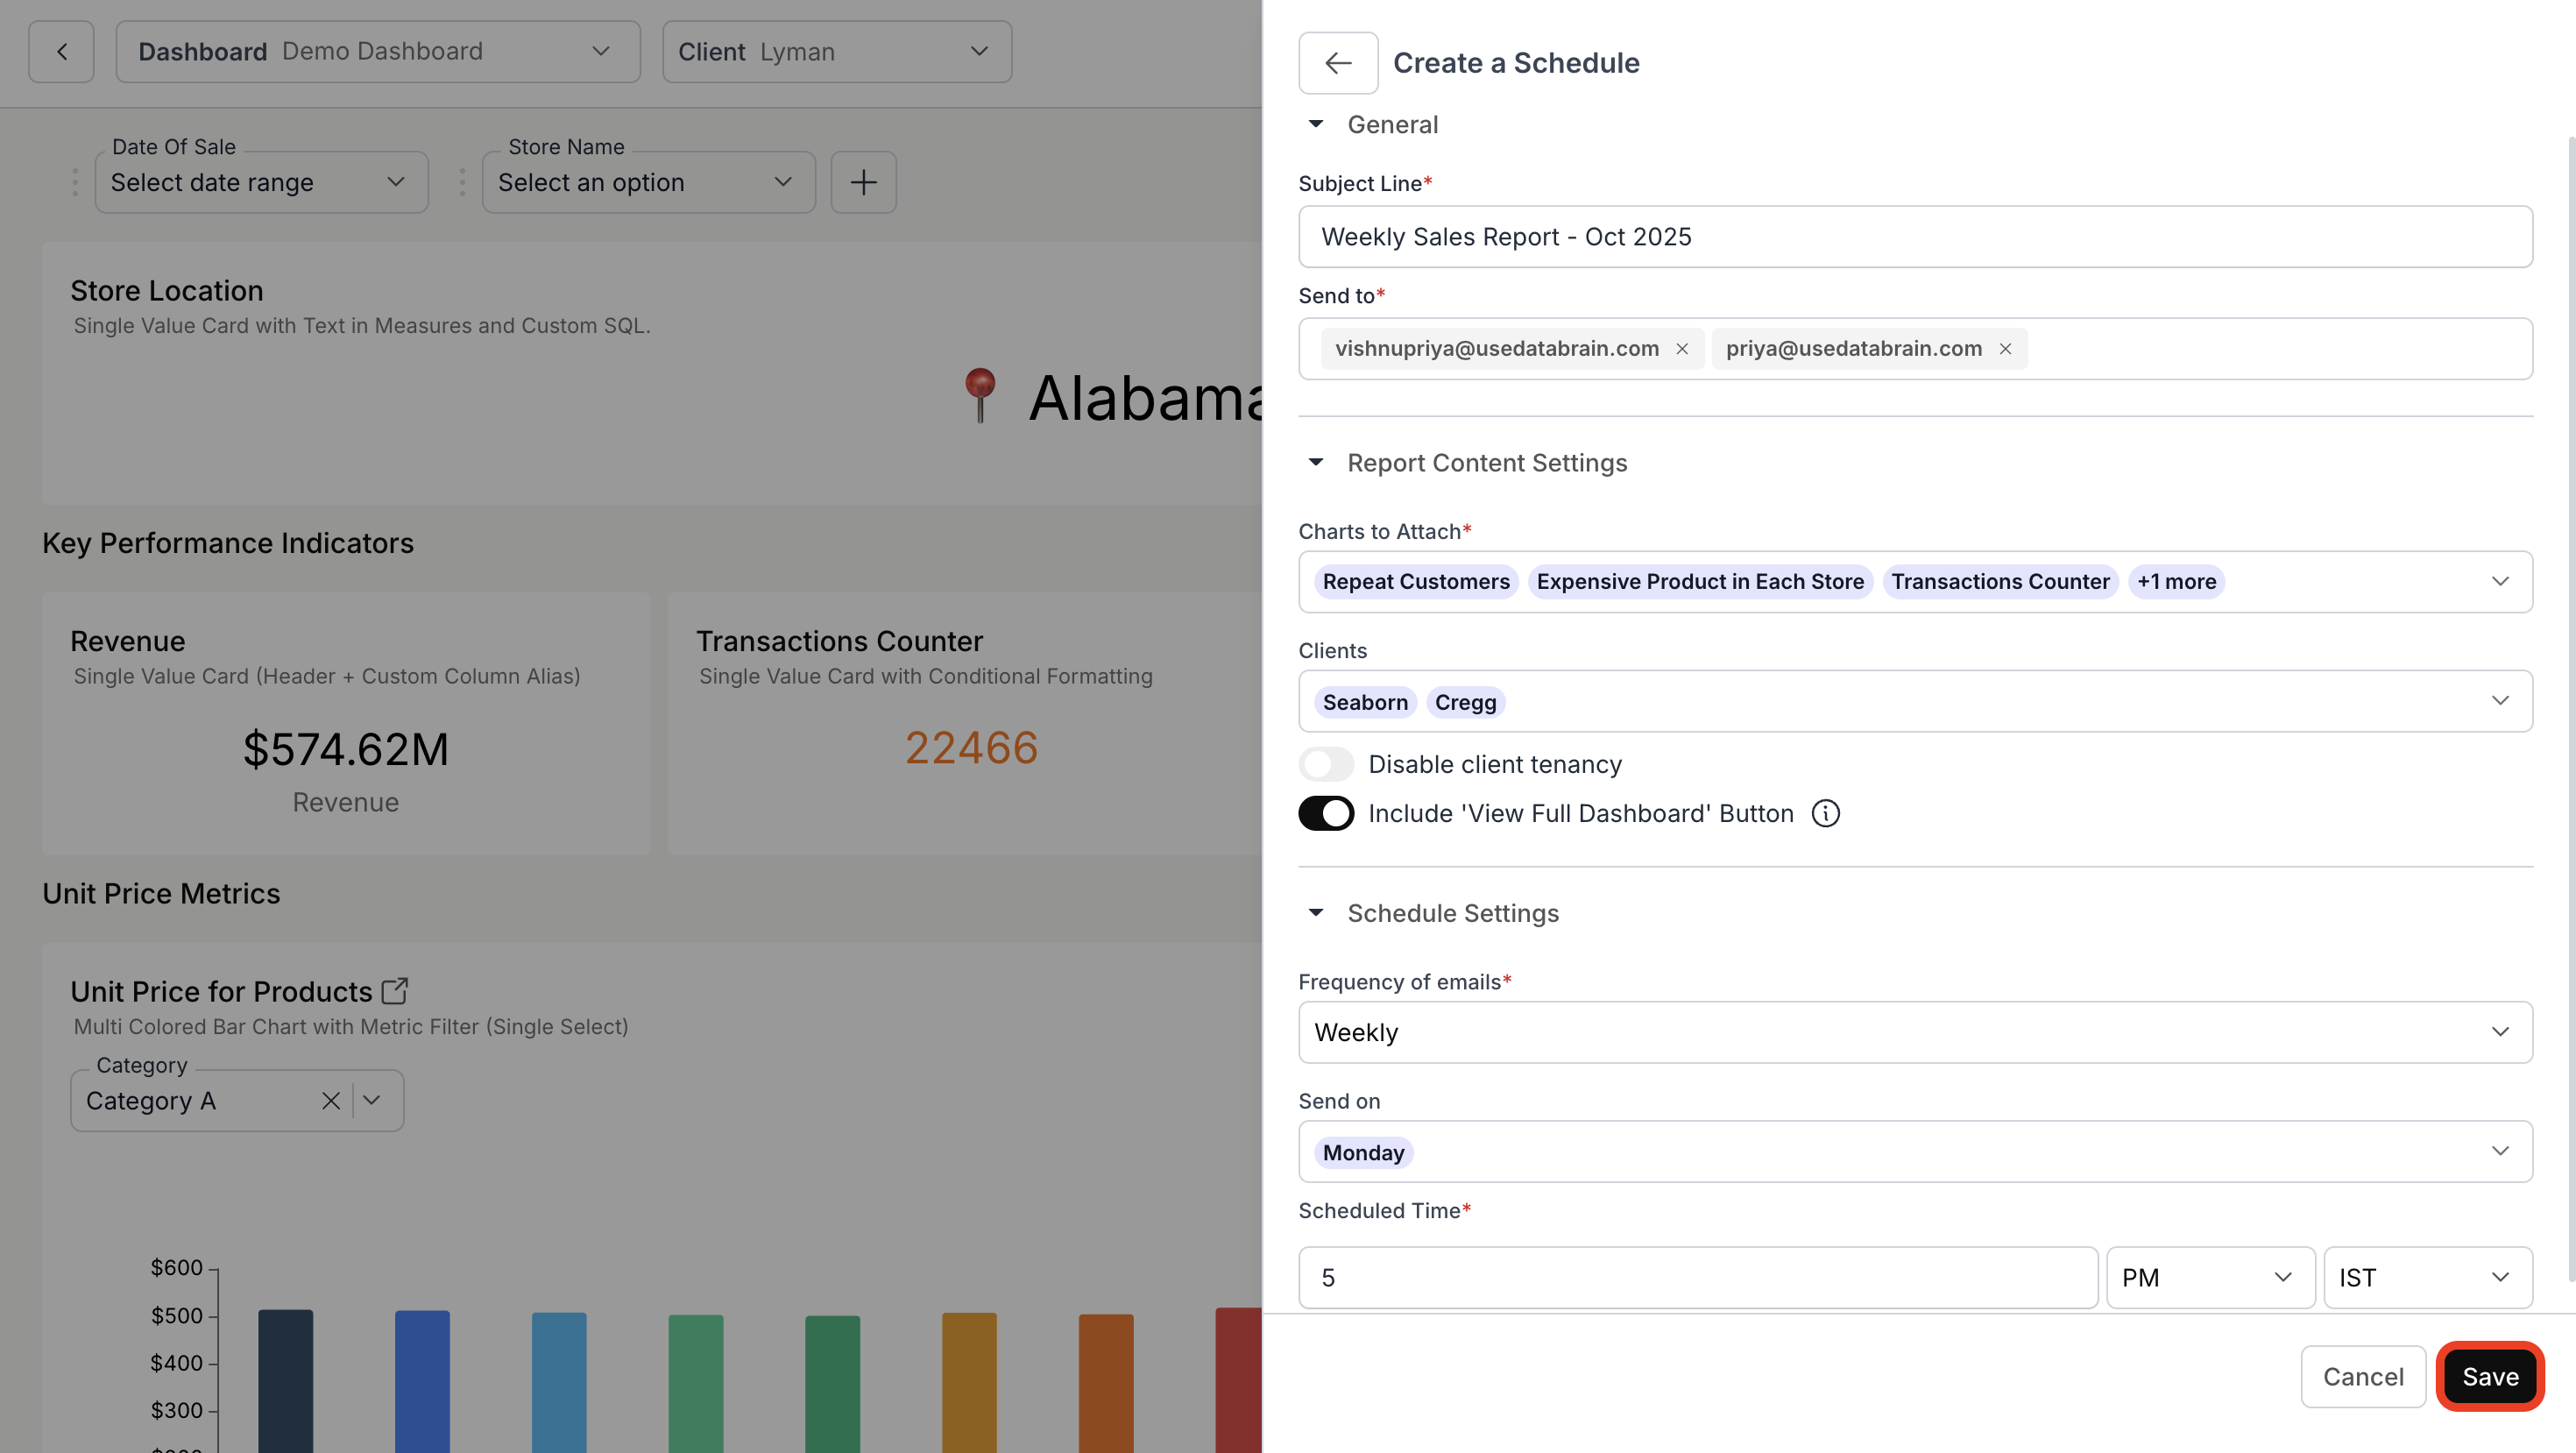
* Enter a descriptive subject line for the report and add recipient email addresses in the **"Send to"** field.
* Then, select desired charts from the **"Charts to Attach"** dropdown menu and choose relevant clients from the **"Clients"** dropdown list.
* Set email frequency by selecting one of the following options:
* Daily
* Weekly
* Monthly
* Then, choose specific days for report delivery and set your preferred scheduled time and timezone.
* Finally, click **"Save"** to confirm the settings.
## 2. Configure Report Scheduler
* Enter a descriptive subject line for the report and add recipient email addresses in the **"Send to"** field.
* Then, select desired charts from the **"Charts to Attach"** dropdown menu and choose relevant clients from the **"Clients"** dropdown list.
* Set email frequency by selecting one of the following options:
* Daily
* Weekly
* Monthly
* Then, choose specific days for report delivery and set your preferred scheduled time and timezone.
* Finally, click **"Save"** to confirm the settings.
 ## 3. View the Scheduled Reports
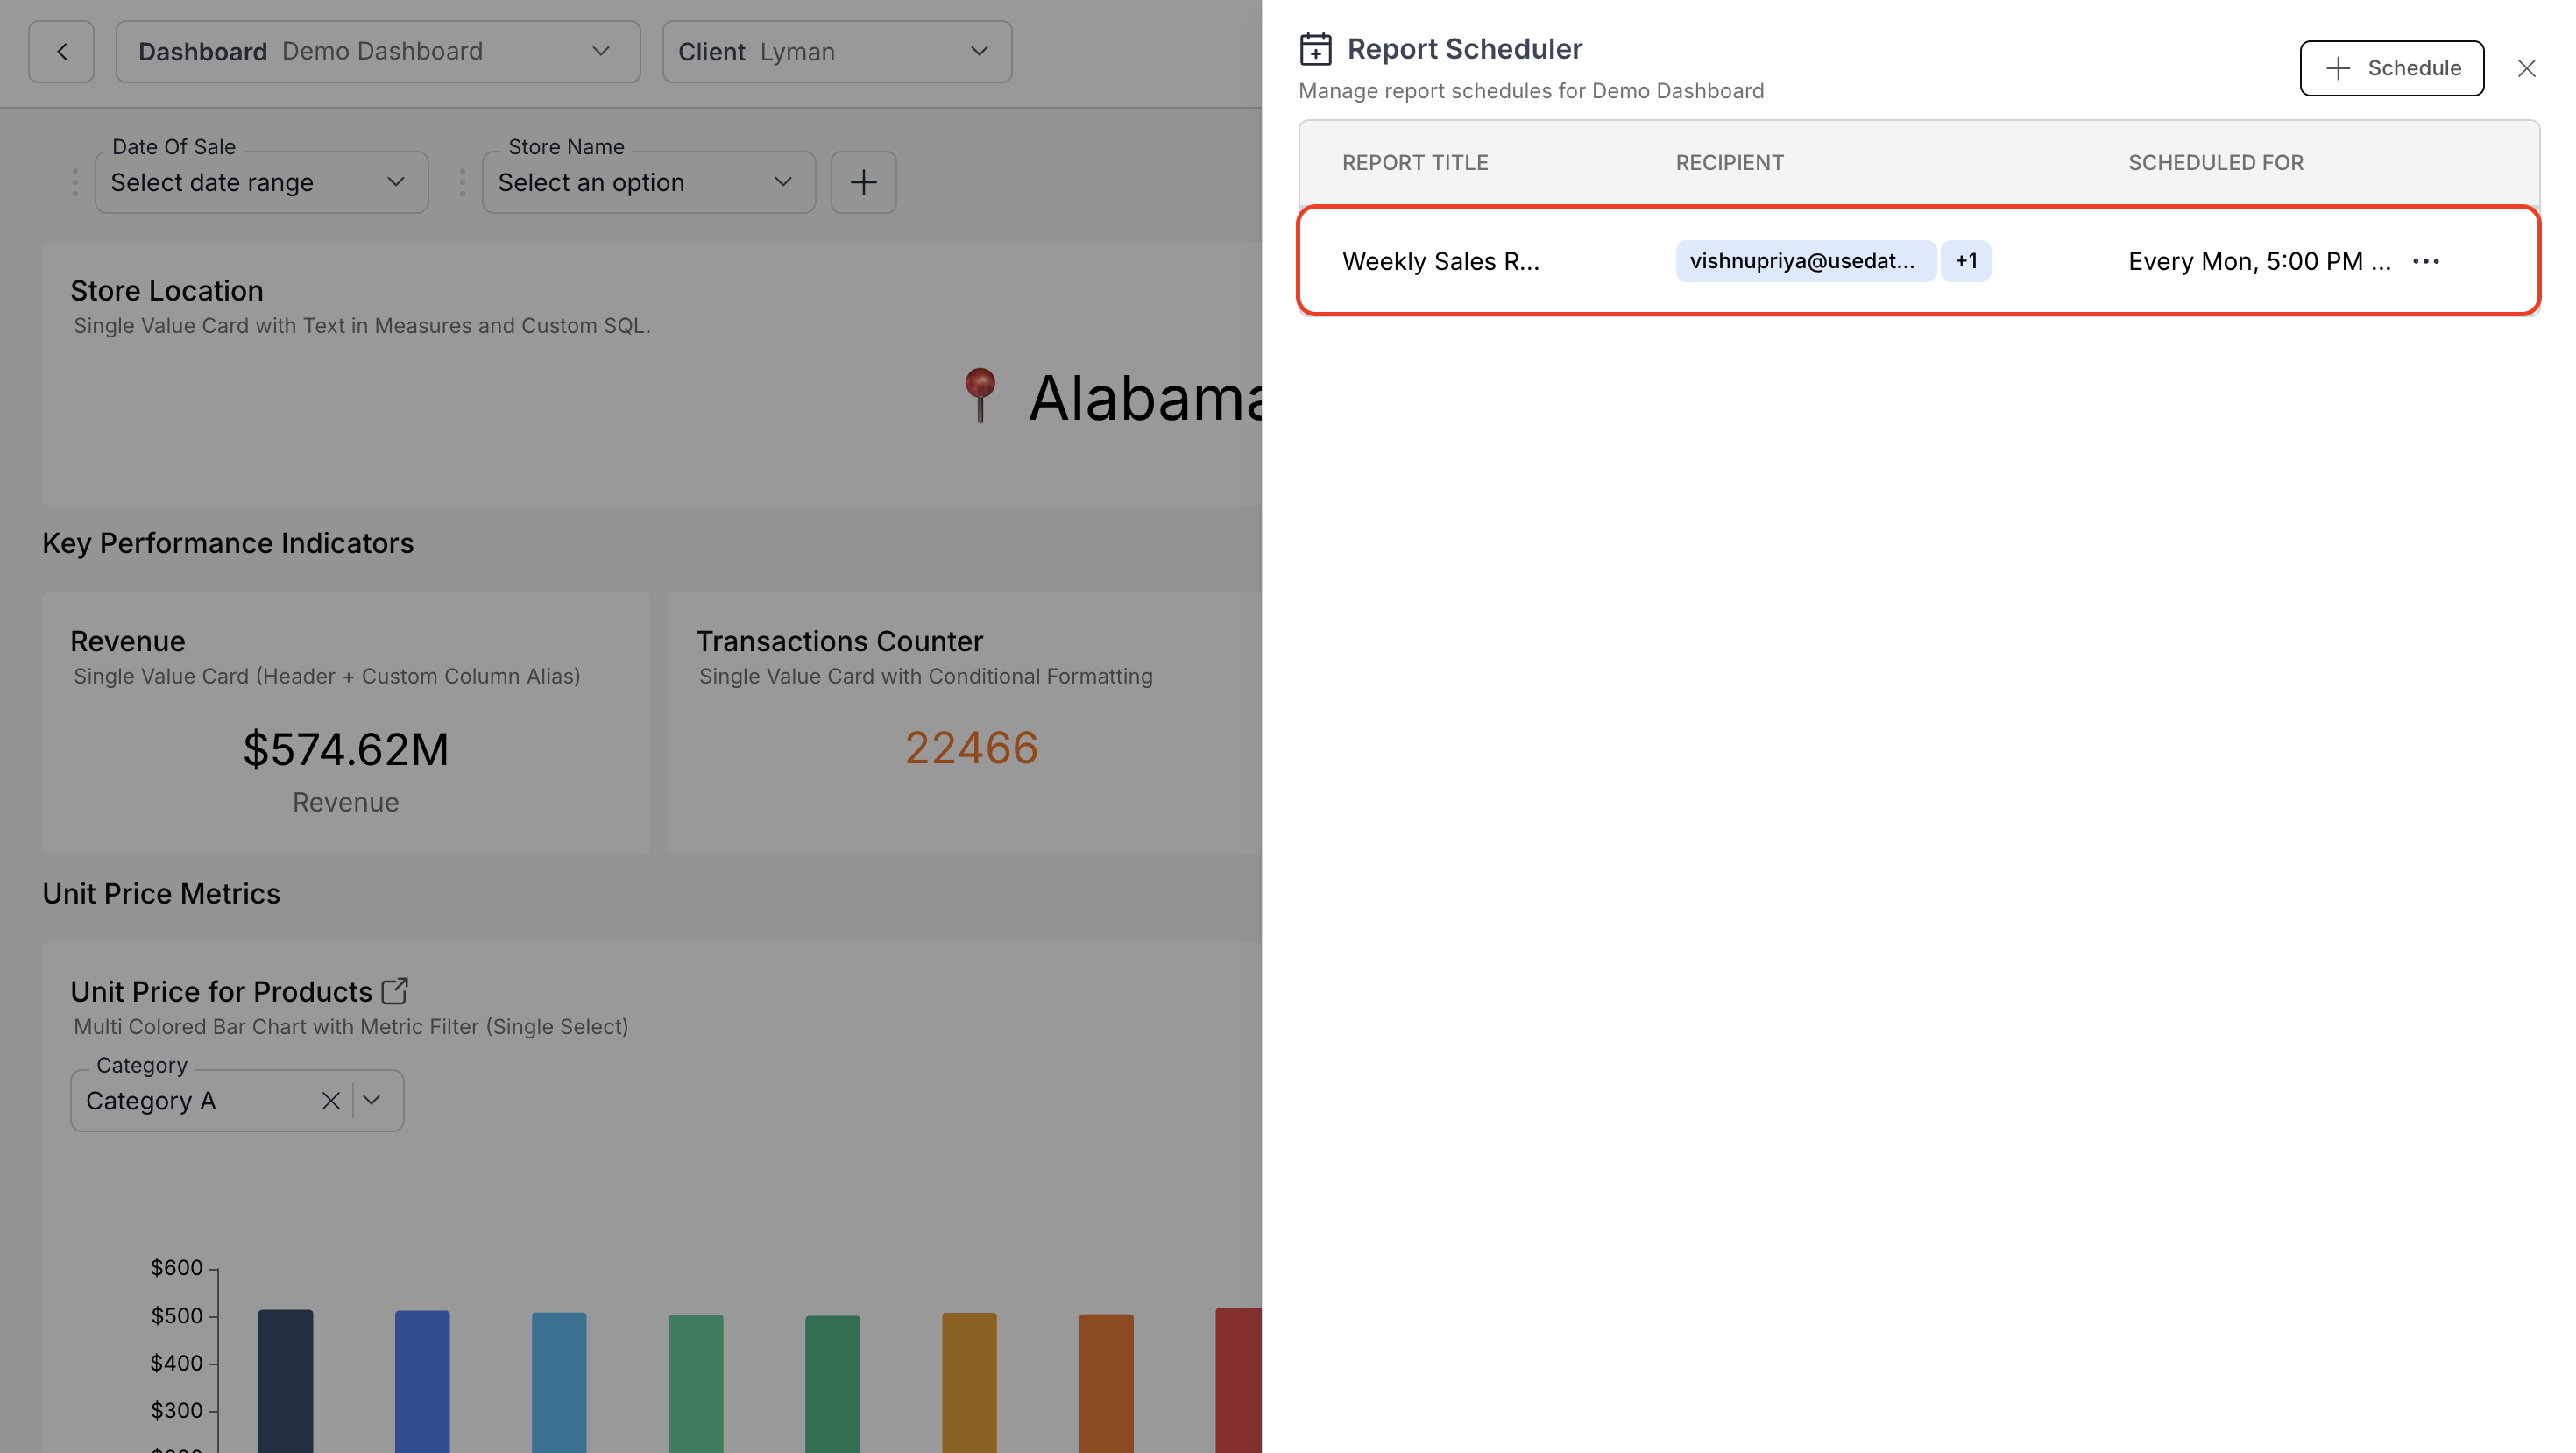
Once scheduled, all created reports will be visible under the **Report Scheduler** window.\
This list displays the **report title**, **recipient email**, and **scheduled time**.
## 3. View the Scheduled Reports
Once scheduled, all created reports will be visible under the **Report Scheduler** window.\
This list displays the **report title**, **recipient email**, and **scheduled time**.
 ## Manage Existing Scheduled Reports
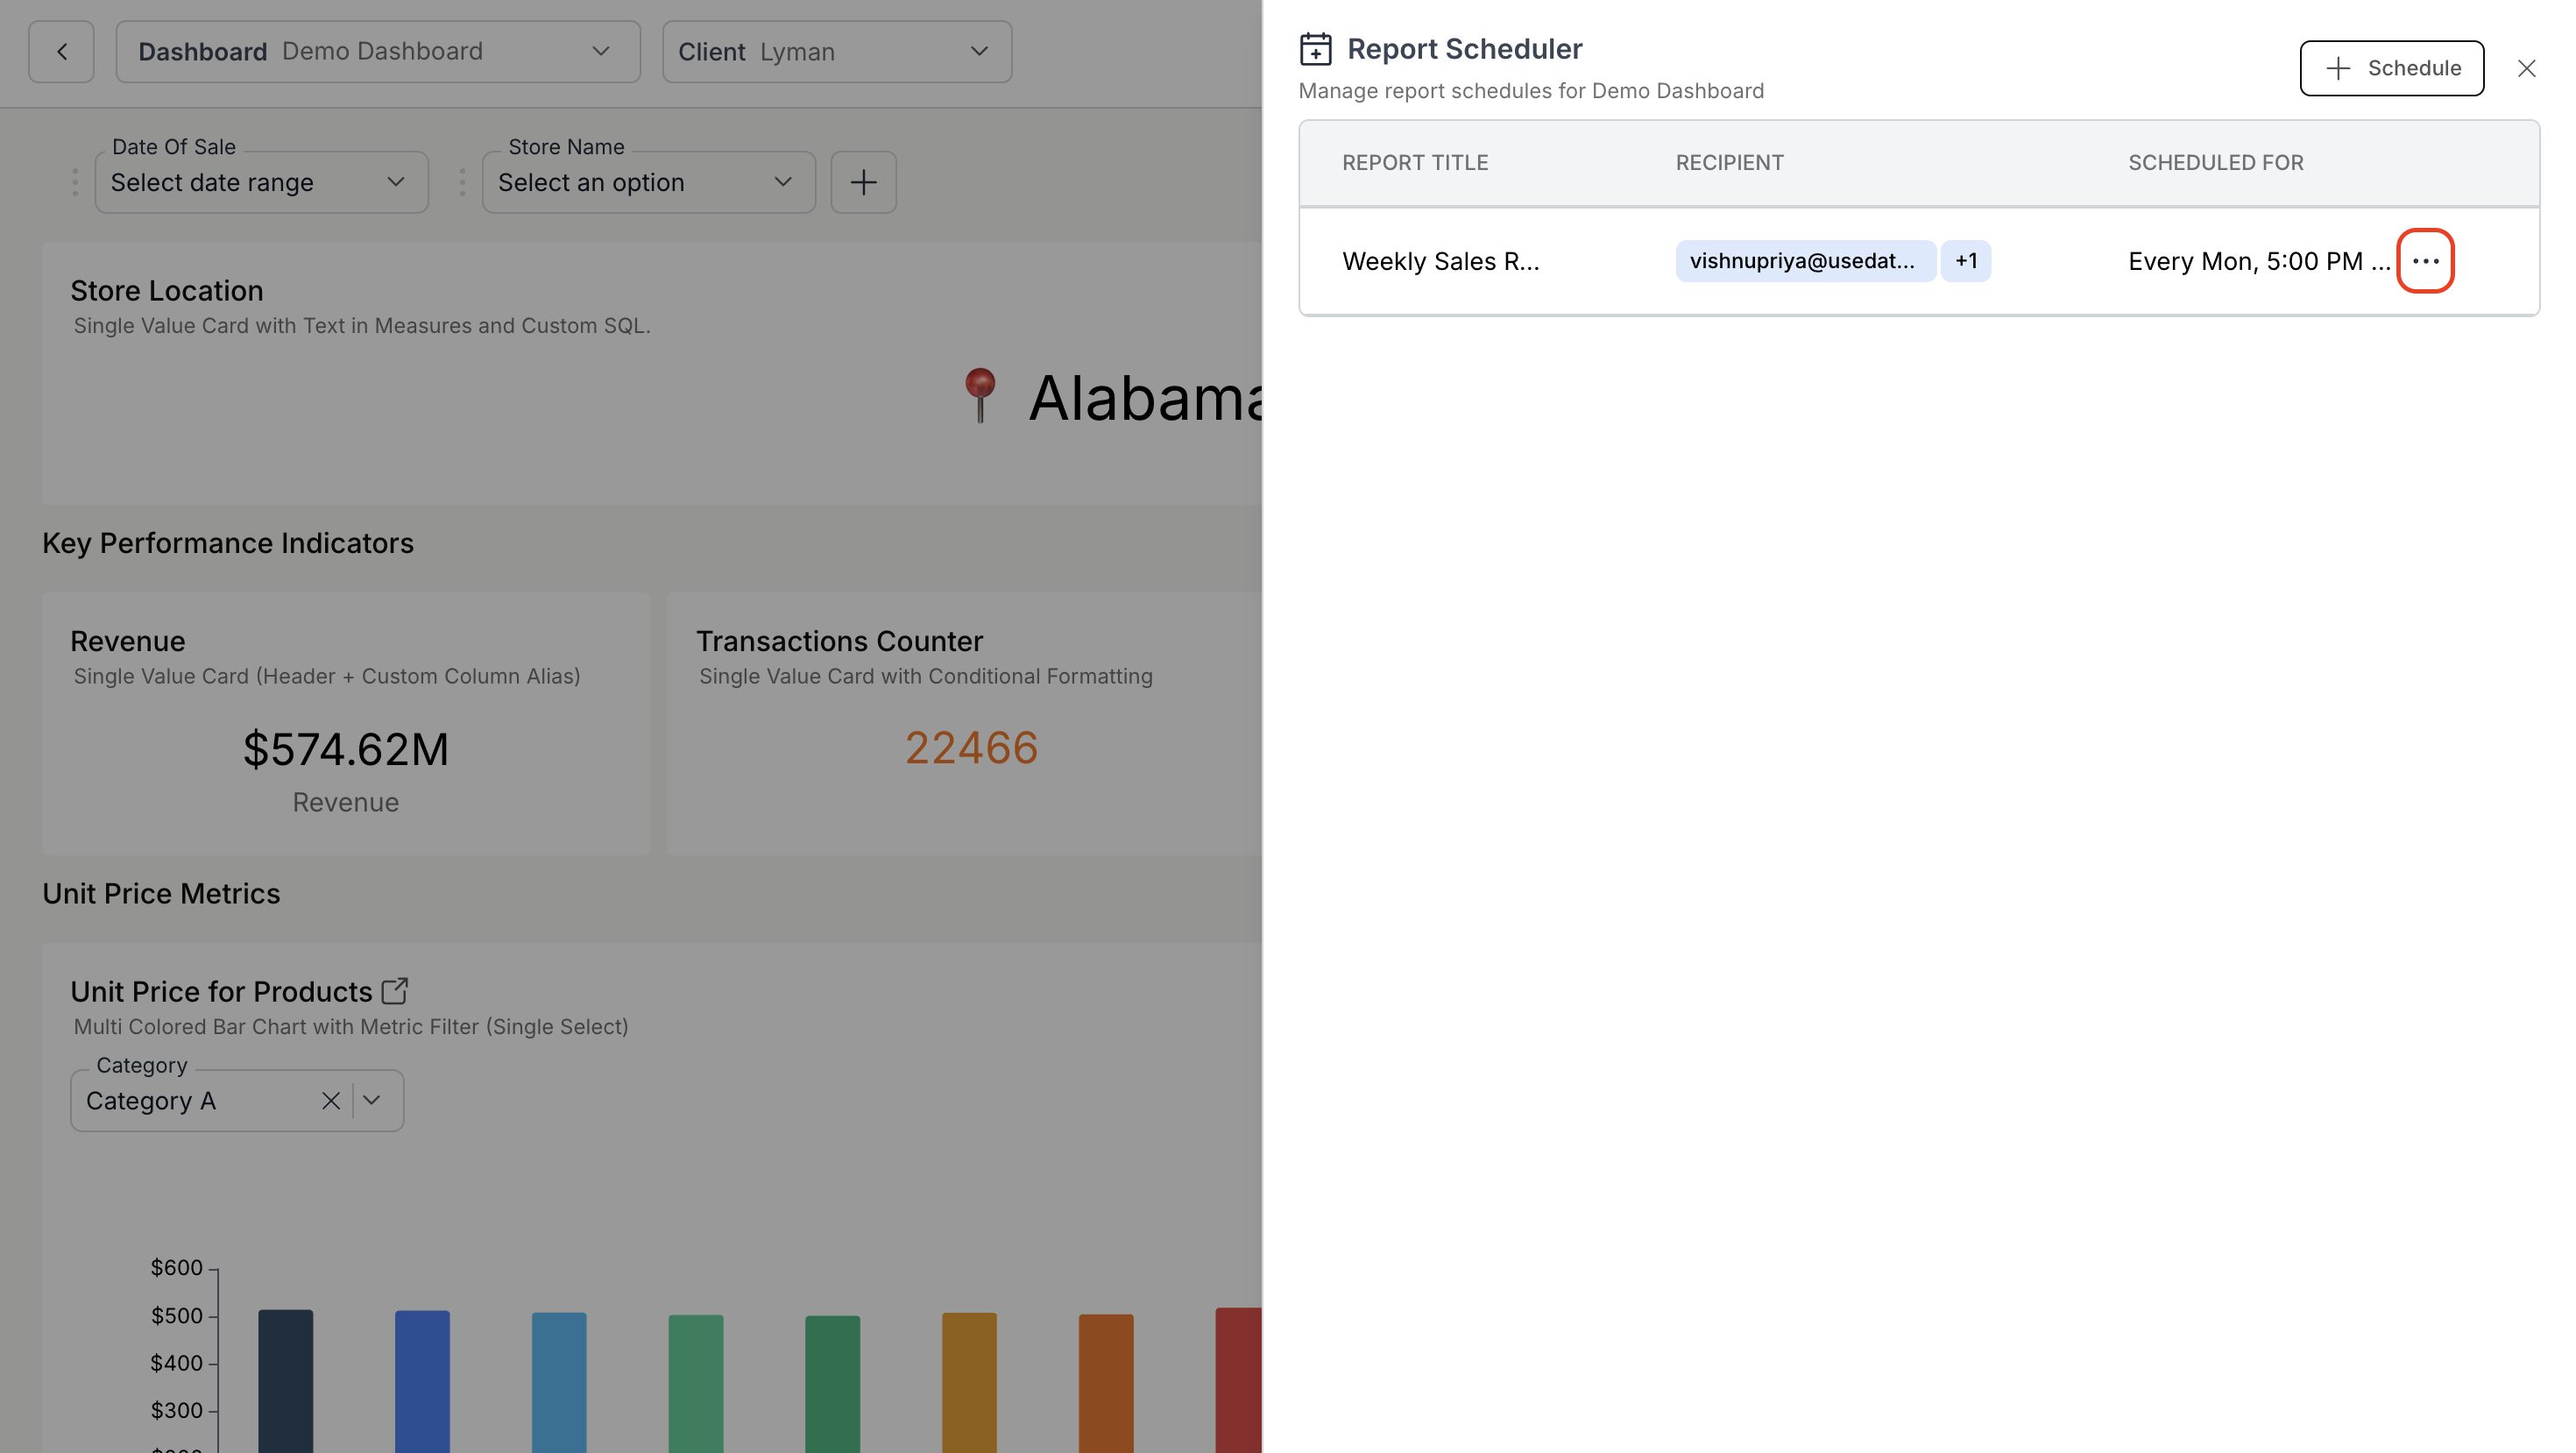
* **To edit:** Click on the report to make the necessary changes and click on **"Update"**
* **To delete:** Click the three dots (⋮) icon and select **"Delete"**
## Manage Existing Scheduled Reports
* **To edit:** Click on the report to make the necessary changes and click on **"Update"**
* **To delete:** Click the three dots (⋮) icon and select **"Delete"**
 You’ve successfully scheduled automated dashboard reports.\
Your reports will now be delivered automatically to the selected recipients with the configured frequency and charts.
You’ve successfully scheduled automated dashboard reports.\
Your reports will now be delivered automatically to the selected recipients with the configured frequency and charts.