> ## Documentation Index
> Fetch the complete documentation index at: https://docs.usedatabrain.com/llms.txt
> Use this file to discover all available pages before exploring further.
# How to Invite Users?
> Learn how to invite users and configure email settings in both app and self-hosted environments.
## App Environment
### 1. Inviting a User
In the app environment, an admin can invite users with or without configuring email settings.\
In both cases, the invited user will receive an email notification with a secure login link.
* **If email settings are configured:**\
The invitation email will be sent using your configured email service.
* **If email settings are not configured:**\
Databrain will automatically send the invitation email.
1. Navigate to the **"Invite User"** section.
2. Enter the user’s email address.
3. Assign a role — Developer, Editor, or Viewer and select the workspaces the user should have access to.
4. Click **"Invite"** to complete the process.
.gif?s=bcc9d050e0992bb74b4c7e479c1b01c8) ***
### 2. Logging In
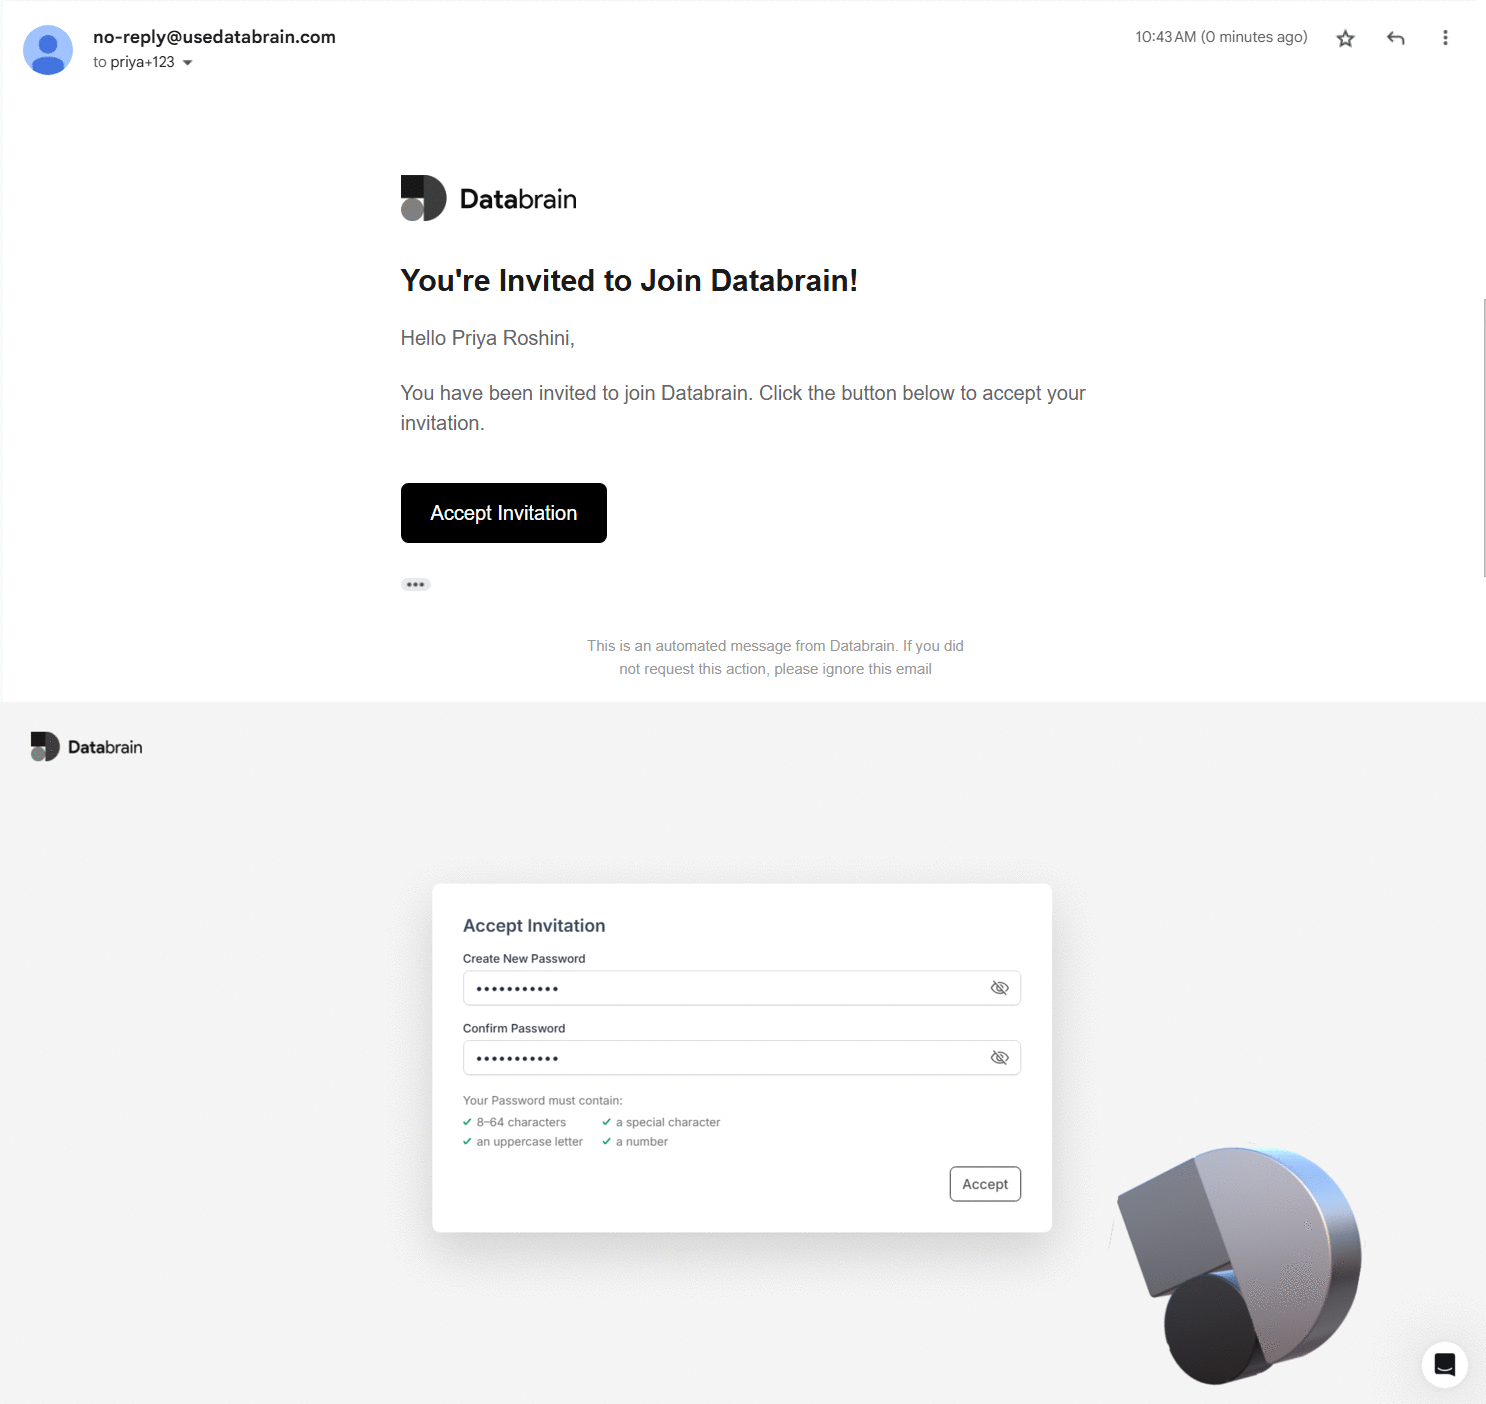
The invited user will receive an email containing a login link.\
By clicking the link, they can log in and access their Databrain account.
***
### 2. Logging In
The invited user will receive an email containing a login link.\
By clicking the link, they can log in and access their Databrain account.
 ***
## Self-Hosted Environment
In a self-hosted environment, the admin must configure email settings before inviting users.\
This ensures that invitation emails are delivered successfully.
### 1. Configuring Email Settings
1. Navigate to the **"Settings"** page.
2. In the **"Embed Settings"** section, configure the required email settings.
3. Click **"Authenticate"** to save and validate the configuration.
***
## Self-Hosted Environment
In a self-hosted environment, the admin must configure email settings before inviting users.\
This ensures that invitation emails are delivered successfully.
### 1. Configuring Email Settings
1. Navigate to the **"Settings"** page.
2. In the **"Embed Settings"** section, configure the required email settings.
3. Click **"Authenticate"** to save and validate the configuration.
.png?fit=max&auto=format&n=IOxmGGEe0Fs9FxND&q=85&s=471a7ac118d5aa34b84e6528426faf72) ***
### 2. Inviting a User
After the email settings are configured:
1. Navigate to the **"Invite User"** section.
2. Enter the user’s email address.
3. Assign a role — Developer, Editor, or Viewer and select the workspaces the user should have access to.
4. Click **"Invite"** to complete the process.
***
### 2. Inviting a User
After the email settings are configured:
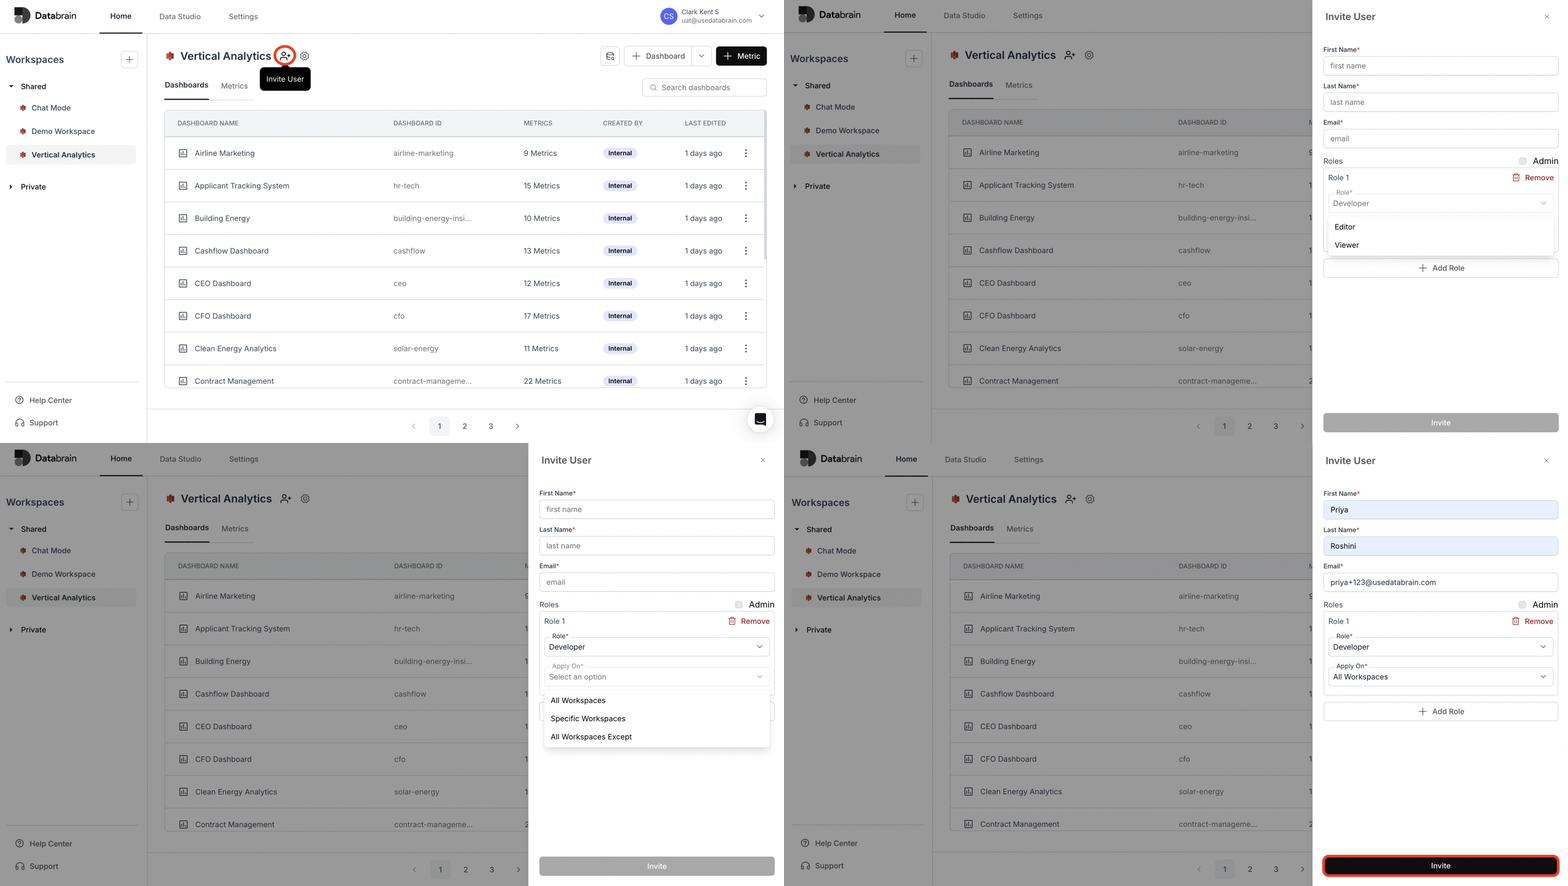
1. Navigate to the **"Invite User"** section.
2. Enter the user’s email address.
3. Assign a role — Developer, Editor, or Viewer and select the workspaces the user should have access to.
4. Click **"Invite"** to complete the process.
 ***
### 3. Logging In
The invited user will receive an email containing the login link.\
They can click the link and log in to access their Databrain account.
***
### 3. Logging In
The invited user will receive an email containing the login link.\
They can click the link and log in to access their Databrain account.