What You’ll Build
By the end of this guide, you’ll have:- ✅ A secure backend endpoint that generates guest tokens
- ✅ A frontend application with embedded DataBrain dashboards
- ✅ Row-level security for multi-tenant access control (optional)
- ✅ Customized dashboard appearance matching your brand
- ✅ Production-ready authentication flow
Quick Navigation
Jump to any section:- Prerequisites
- Architecture Overview
- Step 1: Create Workspace & Dashboard
- Step 2: Create Data App
- Step 3: Backend Integration
- Step 4: Frontend Integration
- Step 5: Testing & Deployment
- Next Steps
Prerequisites
Ensure you have the following before starting:| Requirement | Description | Link |
|---|---|---|
| DataBrain Account | Sign up for a free account | app.usedatabrain.com |
| Data Source | Connected database or data warehouse | Data Sources Guide |
| Backend Server | For secure token generation (Node.js, Python, Go, .NET, etc.) | - |
| Frontend App | React, Vue, Angular, or vanilla JS application | - |
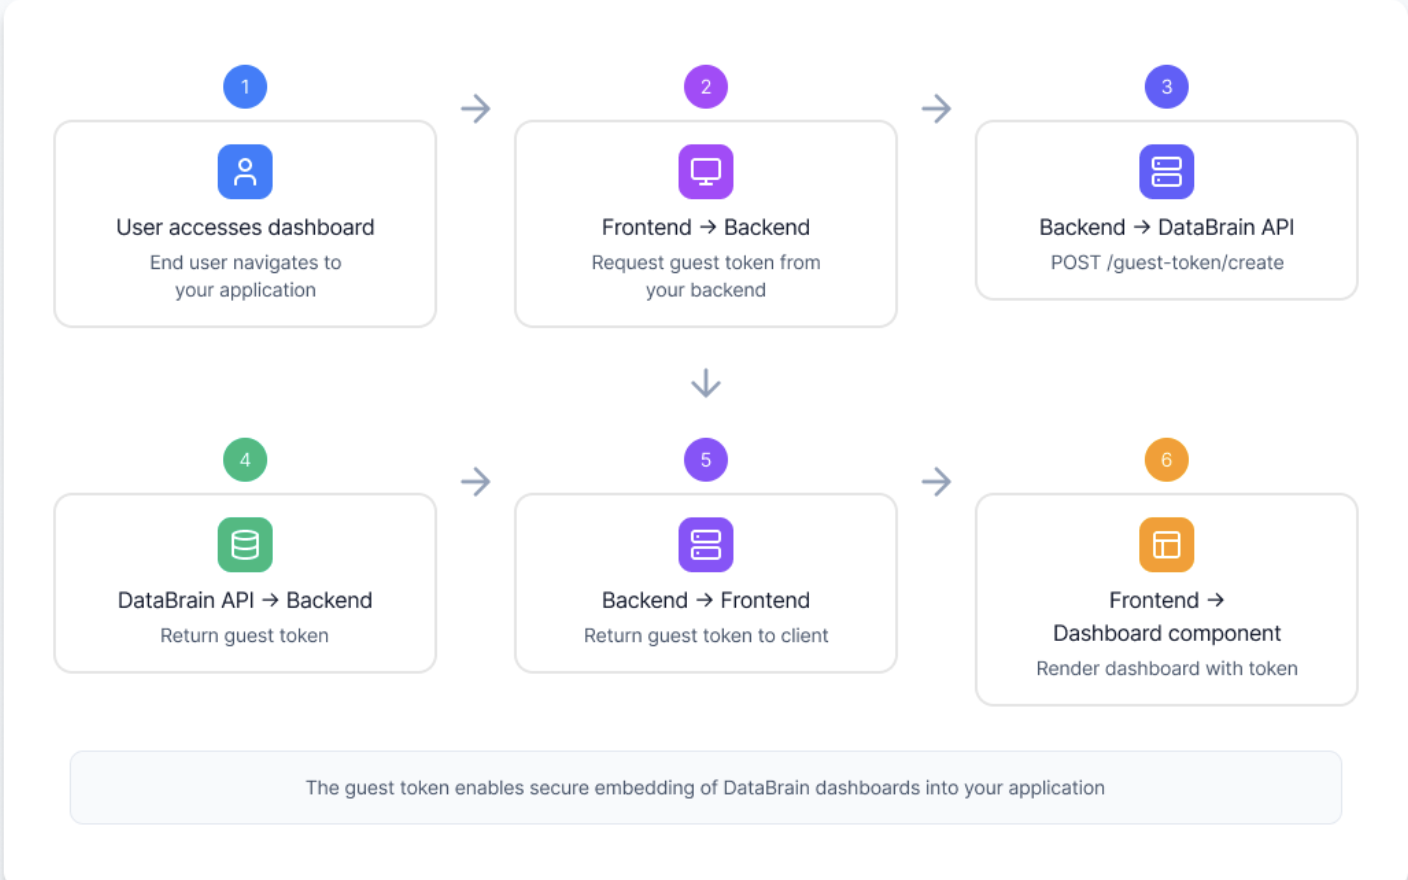
Architecture Overview
Flow Diagram:
Step 1: Create Workspace & Dashboard
1.1 Create a Workspace
Create Workspace Guide
Detailed workspace creation guide
1.2 Connect Data Source
Data Sources Guide
Connect your database
1.3 Create Dashboard
Create Dashboard Guide
Build your first dashboard
Step 1 Complete!Before moving to Step 2, verify you have:
- Created a workspace in DataBrain
- Successfully connected at least one data source
- Built and saved a dashboard with metrics
- Noted your dashboard ID for later use
Step 2: Create Data App
A Data App packages your dashboards for embedding with security and configuration.2.1 Navigate to Data Apps
Go to Data → Data Apps in your workspace2.2 Create New Data App
2.3 Find Your Dashboard ID
Finding Dashboard IDs
Detailed guide on locating IDs
Step 2 Complete!Before moving to Step 3, verify you have:
- Created a Data App in your workspace
- Added your dashboard(s) to the Data App
- Copied and securely stored your API token
- Have your Data App name ready (e.g.,
customer-analytics-app)
Step 3: Backend Integration
Set up your backend to generate guest tokens securely.3.1 Store API Token
Add your DataBrain API token to environment variables:3.2 Implement Token Generation
Create an API endpoint to generate guest tokens:Verify Token Generation
Test your endpoint to ensure tokens are being generated correctly:Step 3 Complete!Before moving to Step 4, verify you have:
- Environment variables configured with API token
- Backend endpoint created for token generation
- Successfully tested token generation (returns valid JWT)
- Tokens are secured server-side (never exposed to frontend)
Step 4: Frontend Integration
4.1 Install Package
4.2 Create Dashboard Component
Basic Implementation (All Frameworks):Step 4 Complete!Before moving to Step 5, verify you have:
- Installed
@databrainhq/pluginpackage - Created a dashboard component in your frontend
- Dashboard successfully fetches token from your backend
- Dashboard renders with data from DataBrain
Step 5: Testing & Deployment
5.1 Test Locally
5.2 Environment Variables
Set up environment variables for each environment:🎉 Congratulations! You’re Production-ReadyYour embedded analytics are now live! You’ve successfully:
- Created DataBrain workspace and dashboards
- Set up secure backend token generation
- Integrated dashboard into your frontend
- Deployed to production

